
Trivia
SECRETS, TRICKS, BUGS, TRIVIA
EARLY LAST EMPEROR
It is possible to make the Last Emperor appear as early as at the time of the Goblin Invasion, right after Leon's death. You need to make Emperor and kill off all the available characters, i.e. 57 character (Gerard + all 8 members of the 7 available classes) at this point. This takes more time (more people to kill) if you do this later when you have more allies. Note that when the Final Emperor appears due to mass murdering successors, another set of Imperial equipment appears in the Warehouse, which is nice.
An Early Emperor playthrough is very interesting too!
Here are a couple of Earliest Final Emperor runs for reference and details.
Several events cannot happen without one or several Time Skips:
- The Dojo needs one generation to open. Nevertheless, when you defeat the Real Queen, the Dojo appears.
- Item mass production halts without Time Jumps (= R&D'ed items do not appear in shops).
- No challenge letter from Kzinssie. The expanded Sealed Cave never opens, so Kzinssie will inevitably be the Hero waiting for you at the end of the Last Dungeon. This also means that you must defeat all the other Heroes.
- No Windmaker, no Coppelia. No Windmaker means that you must rely on Iris to reach Wagnas, and thus need all of Poet's instruments.
- Miramar needs generations to develop, and its last development stage is the condition for the construction of Leon Bridge, and thus for its destruction by Narwhal. In other words, no fully developped Miramar = no Leon Bridge = no meeting with Narwhal.
- Dantarg cannot evolve without Time Skips.
- No Mole recruitment.
- No Comroon later events (= no eruption, no Salamander recruitment, no Emerged Island).
- No Gemstone Mine Demon Stone quest.
- No Garon's Insurrection nor Sunken Ship.
- Additionally, the Last Emperor cannot trigger the Cape Chalier route to access Nuono (not the Wild type).
Note that with a Last Emperor, fusion spell research completes properly when you complete an event that triggers a Black Screen (i.e. that could trigger a Time Jump with a regular Emperor)(thanks to waycooler for the info) instead of a proper Time Jump. Which means that you usually have at least two occasions to complete your remaining spell researches (your 2 remaining Heroes + possibly remaining events). That said, it is perfectly possible (verging on easier) to beat the game with only very limited magic, so there is no need to worry and complete every research.
In a nutshell, with an Early Final Emperor, be careful:
- Always subdue the Armed Merchants via the Waterway Maze, otherwise you won't be able to get Poet's Bassoon (to reach Wagnas), and be sure to do so before going after Subier (Subier general trigger: talk to the Diver), otherwise you won't be able to reach Nuono.
- Do not attempt to complete the Mermaid Quest (cannot exit the Mermaid Sea the 3rd time / Game Over if completed).
Note that even in a regular playthrough, as you reach the Last Emperor you may have some quests left and some yet unavailable (usually if not enough generations have passed). It just happens sometimes and it's perfectly normal. As seen above, not all quests can be completed with the Final Emperor, but there are a few alternative sequences linked to the fact that there is no Time Jump anymore. E.g.:
- If you defeat the Sorcerer at the bottom of the Emerged Island, the Last Emperor cannot abdicate, so one of your party members sacrifices themselves instead. (This is more generally linked to the fact that when the Last Emperor LP-dies, party member #2 dies instead and the Last Emperor/Empress regains half their own maxLP. Which also means that if you are a solo Final Emperor, it's Game Over.)
- If you have already had your underwater love story, a Fishman envoy from the Mermaid will come to the Throne room to tell you that Subier is in the Frozen Sea: there is no Sunken Ship event if it hadn't occured yet, and you can actually defeat Subier before chasing Garon out of Nuono (if it is open and you had not done that either), who still says that Subier has his back.. Talk to the Diver after defeating Subier to be able to recruit her.
COPPELIA LAST EMPEROR - THE OTHER OTHER LEGEND
It is possible to complete the game with our favorite puppet Coppelia (or anyone you want, actually) instead of the usual Last Emperors: you need to defeat Kzinssie, Bokhohn, Rocbouquet and Wagnas first, then in the same generation defeat Noel, Dantarg and Subier in the Sunken Ship, sit on the throne in Avalon, and head to the Last Dungeon.
There are a few things to plan, mainly to take care of the N Longit events early (the Sunken Ship appears 5 generations after the Garon Quest) and either to kill Narwhal or open 19 generations after Garon's banishment so that Subier may appear in the Sunken Ship. Also, if you want Coppelia for the end, you must recruit her in the previous generation (recruit her before defeating your 4th Seven Hero and make her Empress after the Time Jump that occurs after defeating it).
Be careful also NOT to talk to the Desert Guard after defeating Noel, nor to the Child and Mu Calf after defeating Dantarg, nor to the Diver after defeating Subier.
INFINITE POCKET MONEY


Your pocket money has a max value of 10k Crowns.
If your purse is not full, you can refill it for free at a shop that sells you items for free: just get some items and resell them at once.
Note that this gain does not overflow into your treasury.
This can be useful during the Mermaid Quest for example.
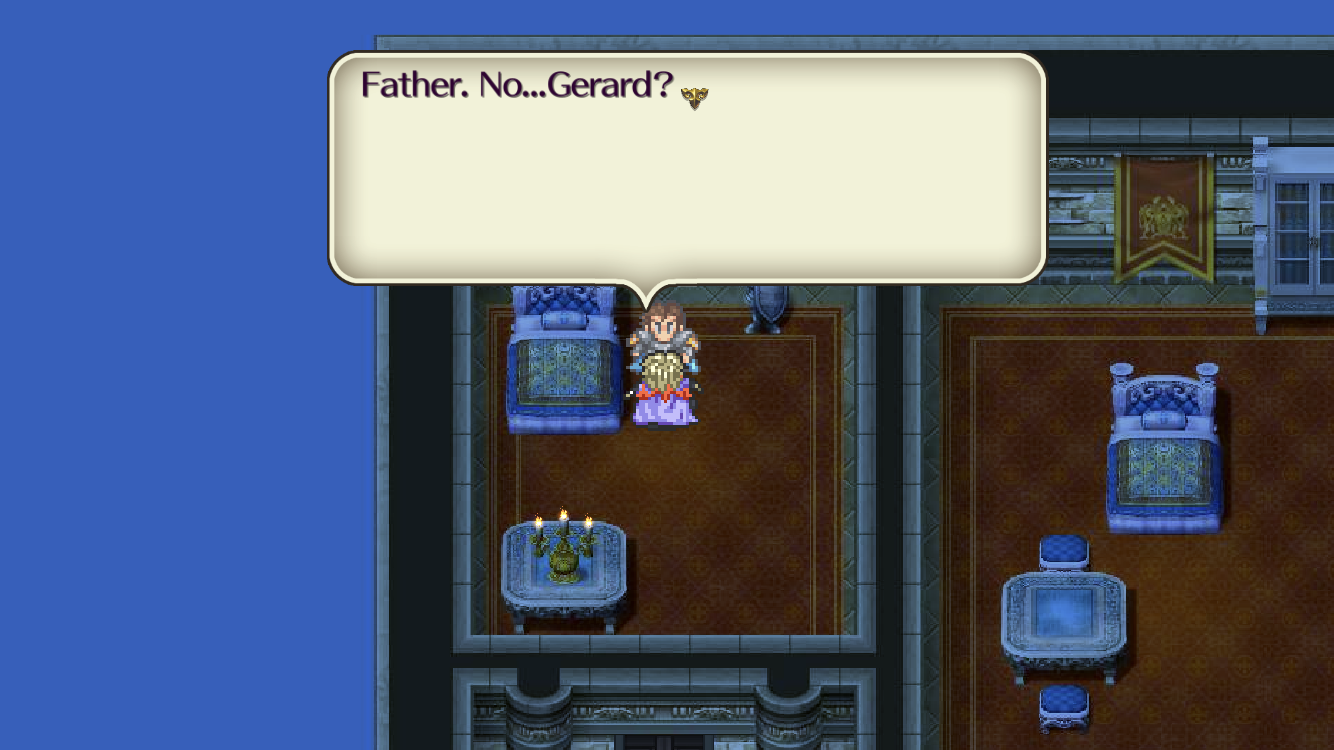
INFINITE TREASURY FUNDS (SFC only)


After defeating Kzinssie in Somon, the city thief is active in Avalon. Now:
1) sleep in your own bed but do not clear the thief event: sleep again at once
2) it is day time now but in the thief's room the chest is full.
3) Repeat until satisfied!
The chest won't refill anymore if you meet with the thief.
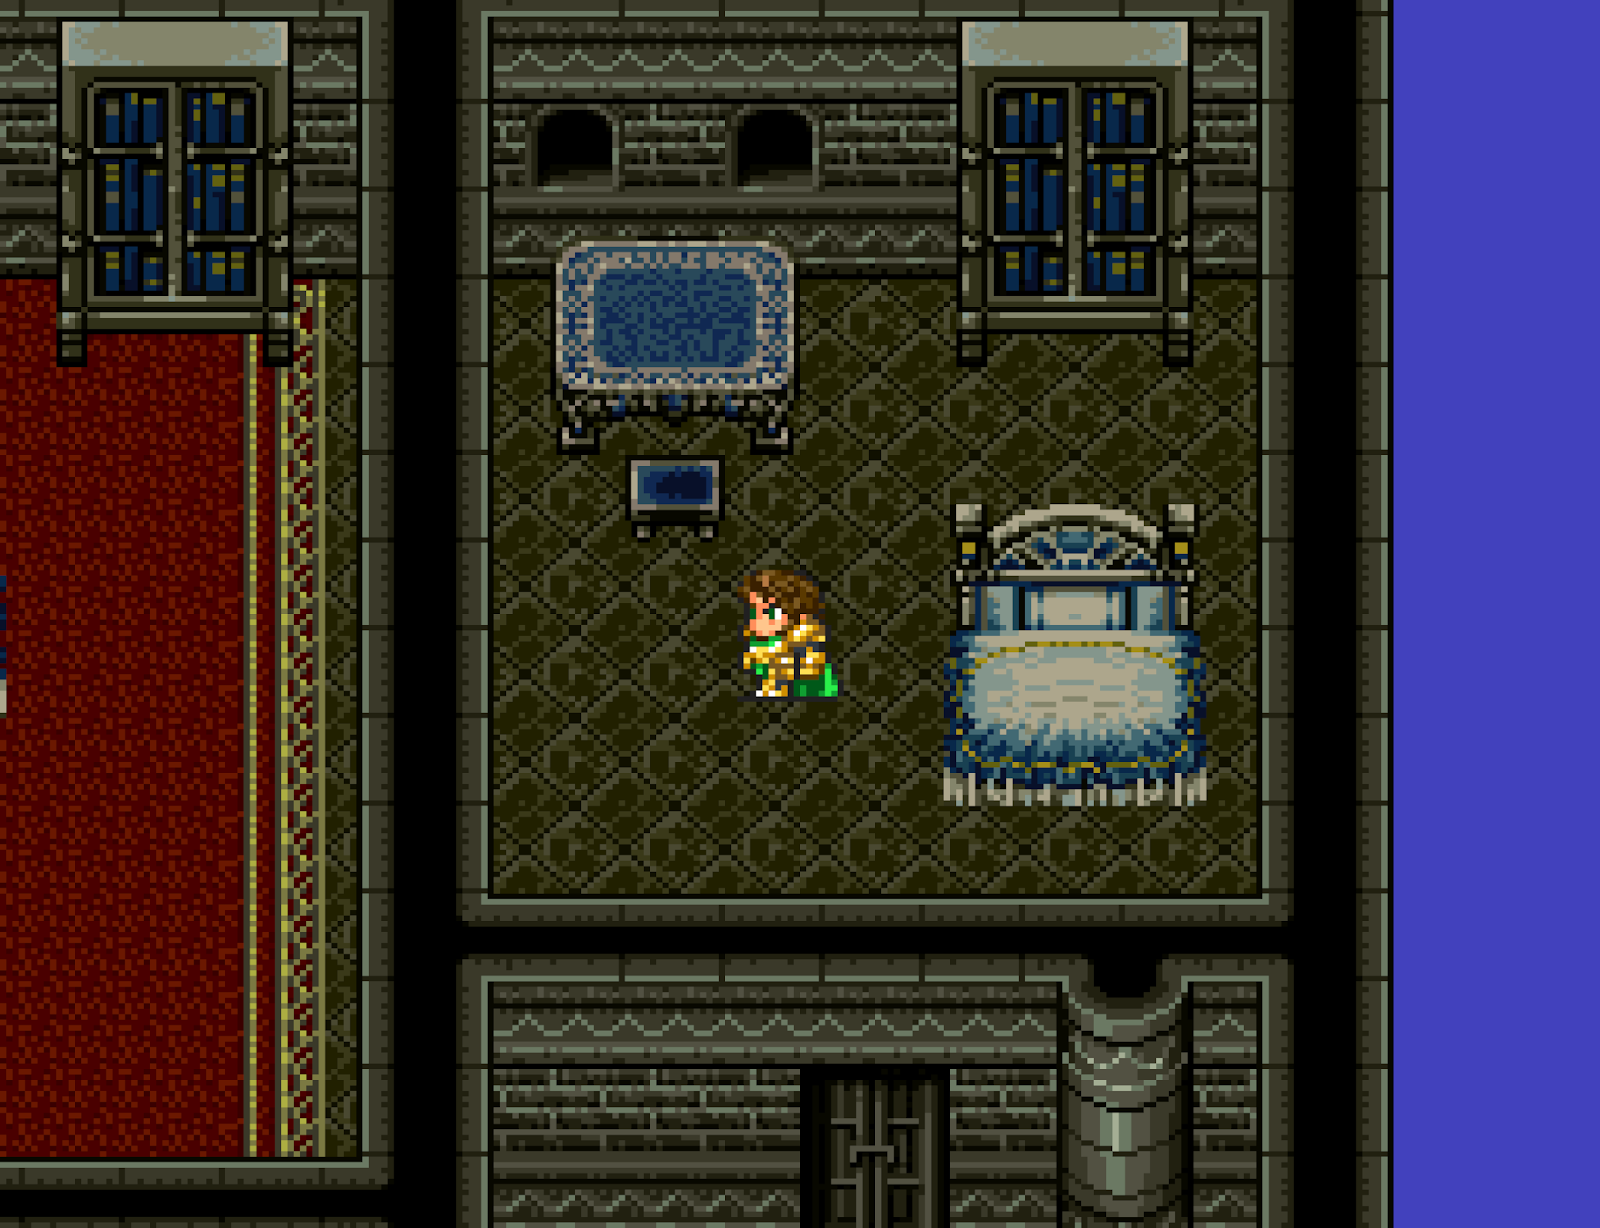
EARLIEST MAGIC RESEARCH FACILITY


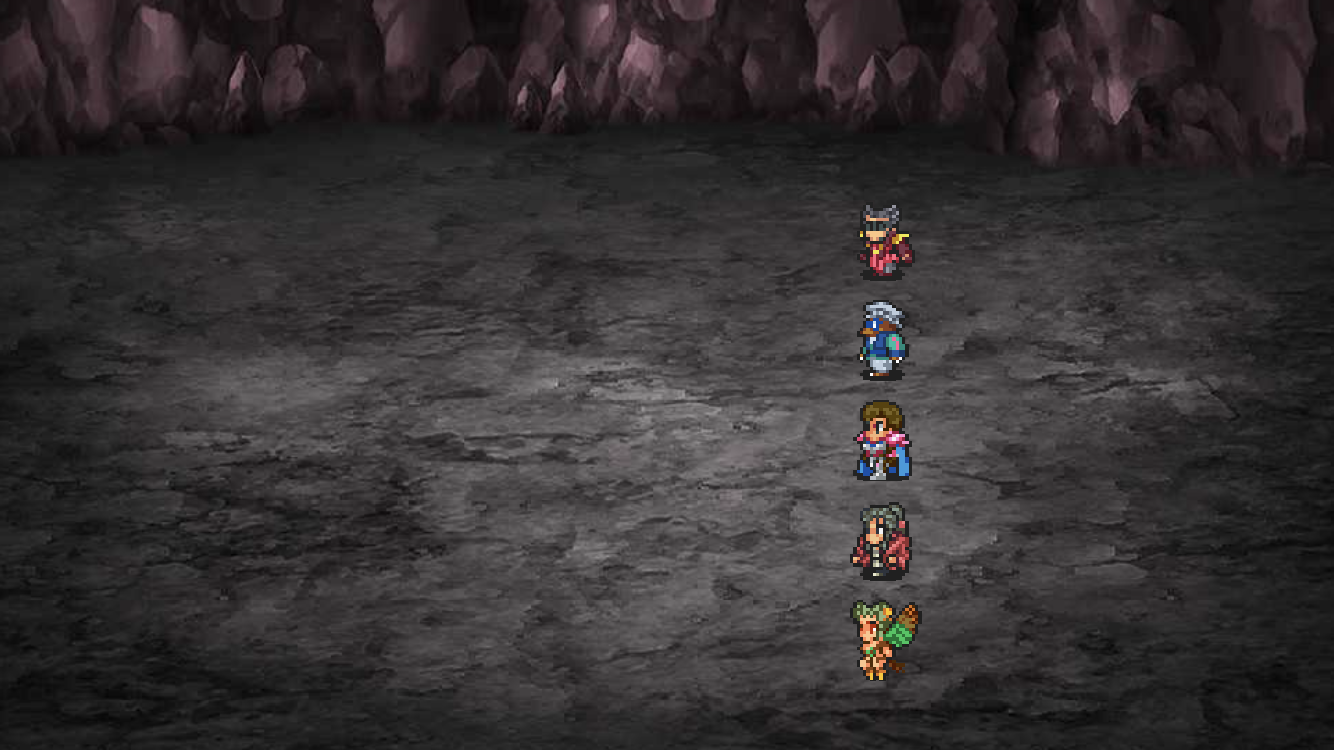
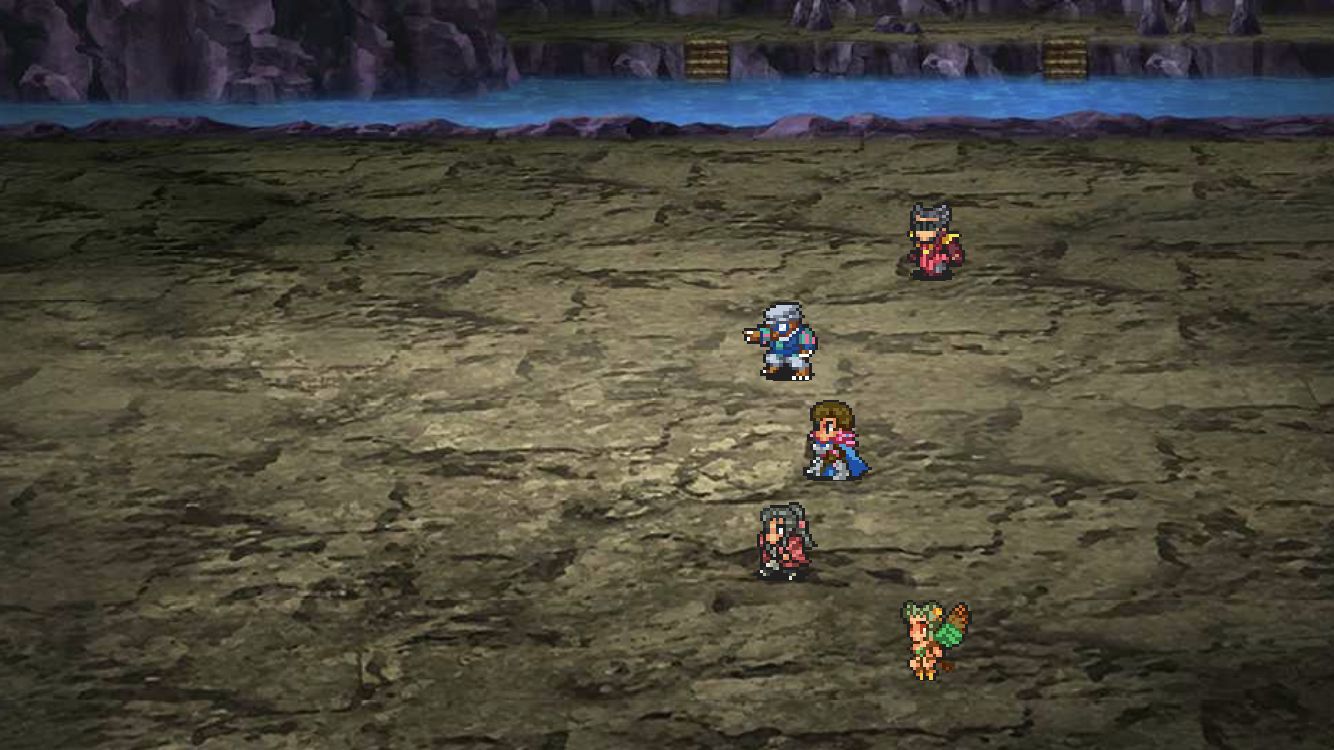
The easiest and earliest way to get the Magic Research Facility is probably to kill off Gerard (un-equip & party-wipe) as soon as you can (Goblin Invasion) and replace him with a couple of Emperors (Emerald alone, with PY AE +2, for example, actually does the trick) that have complementary magics to fill the blanks and get your Emperor 3 different magics: the 25 MP required for the Magic Center should be readily (or nearly) available, even if you missed giving Gerard Fire magic before. Now you just have to defeat Kzinssie.
In the pictures above, the result without early Fire on Gerard, no grinding (about 25-30 battles? during each of which Leon used Light Magic once): with one reincarnation (Emerald), the Emperor has 21 MP.
Note that this is completely optional and superfluous: unlocking the Magic Center later is very OK too (first-time players that rely on a guide just don't realize how early this is and how long the game is).
GRINDING OR NOT GRINDING?
That is a question. You often hear that grinding in RS2 will screw your playthrough because it will make the enemies too strong. Some say it does not matter at all. So what's the story?
For one thing, in SaGa games, contrarily to your typical JRPG, mindless grinding is never encouraged, and sometimes even punished. (It is a repetitive and boring activity that traditionally makes your characters much stronger than their enemies and breeze through a game: perfect for brutes and bullies, haha.)
Here is what happens in RS2. Battling will make your Battle Count go up, which will make strong enemies appear quite fast. Note that fleeing a battle also raises your BC.
This means that grinding (battle win or flee) is not recommended *early on*, when your techs and items cannot keep up, unless you know exactly what you are doing and are confident you can take on stronger enemies with a basic party and tech/items sets (most expert players just flee from all early battles because they are a waste of time, really).
Nevertheless, grinding in RS2 is actually necessary in the late generations (when you get the most money per battle, but not the last generation, at which point you can complete only limited magic research and no item mass production anymore), not to beat the Last Boss (which is not that bad, in fact), but for completionists to unlock all workshop items and trigger or research all magic spells (which require a tremendous amount of money). None of that is compulsory, but it cannot be achieved if you only fought the battles you encountered naturally.
More Strategies and Tactics in the relevant Gameplay section.
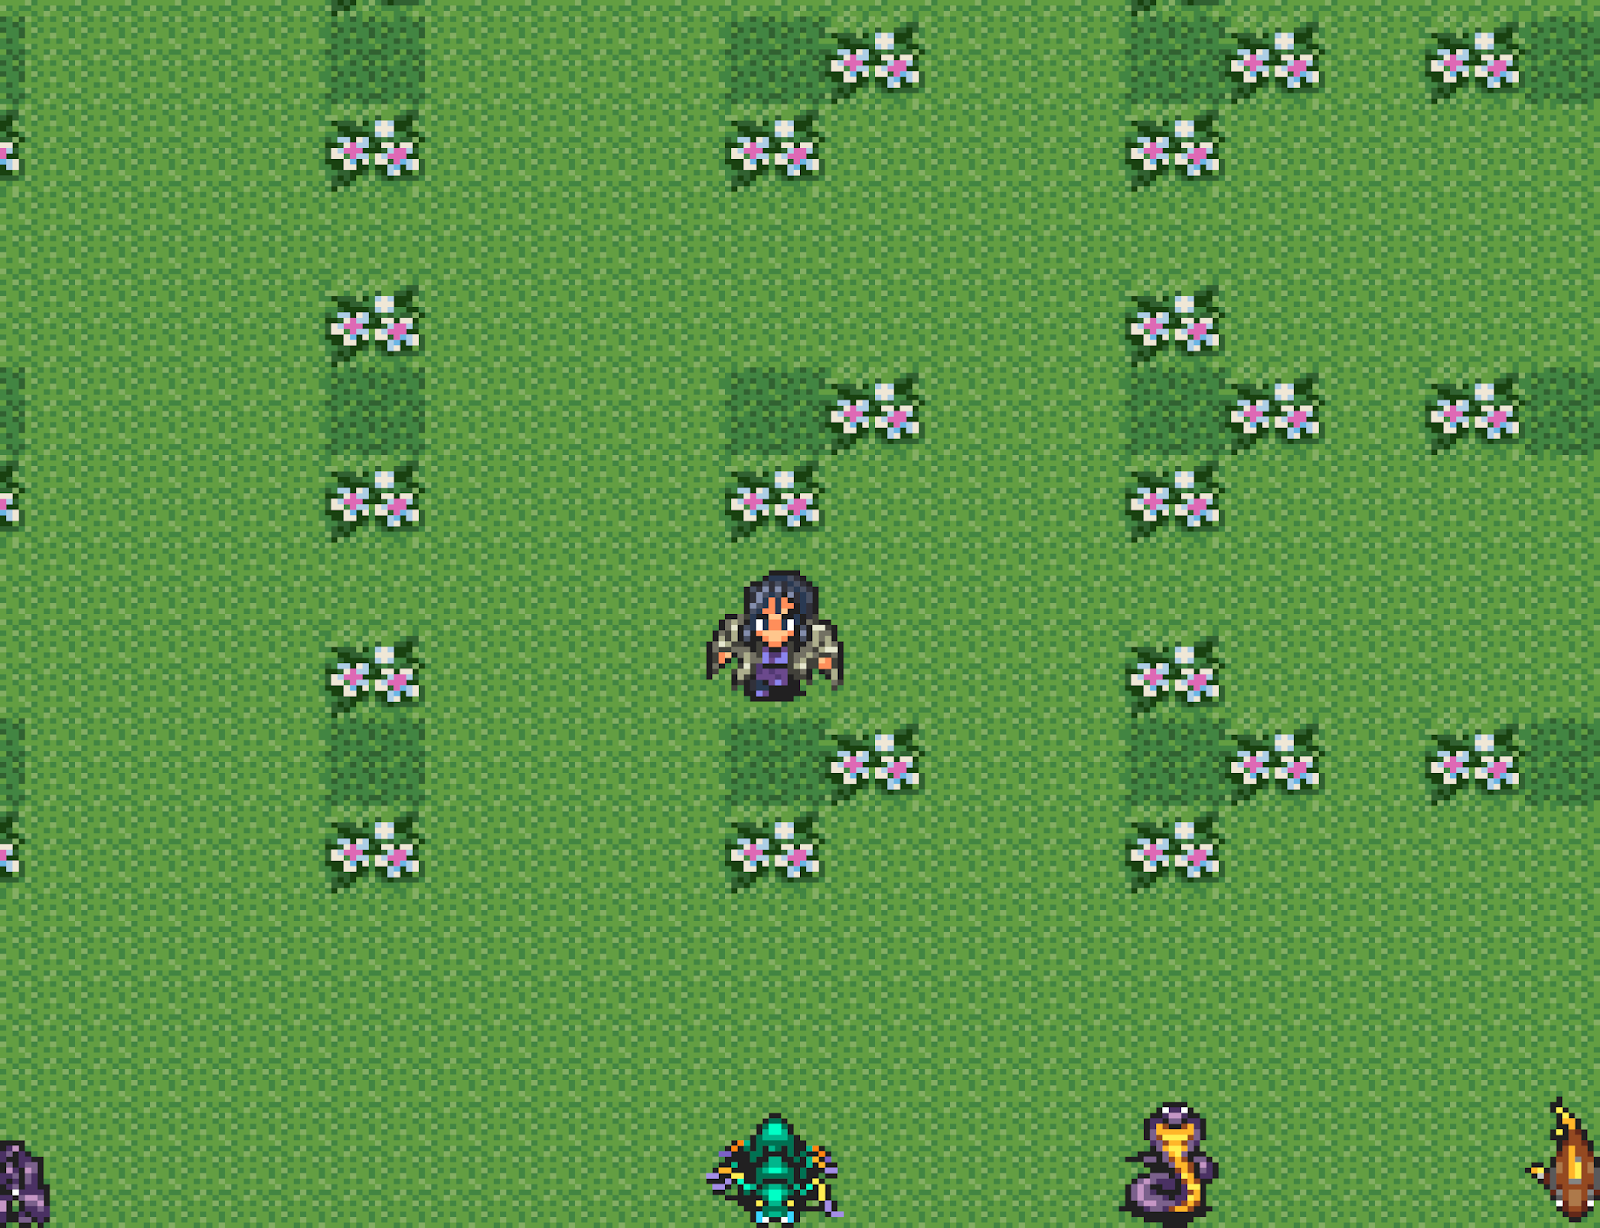
FARMING AND SPARKING SPOTS


The best Tech sparking spots are in the Sparking section.
The best repeatable TP farming spots are arguably:
- Very early on: possibly difficult 1000+ TP for crashing the Canal Fortress Gate. Respawns as long as you do not defeat the Canal Fortress Boss.
- Slightly later: very easy 6000 TP for doubting the Sorcerer in the Seer's Citadel and defeating him (condition: HP < 256). Note that you need the Stone Boat to reach the Room of Records in Zemio (and thus might want to do that with an Empress to unlock the Amazon at the same time) and possibly Lob Omen, found in the Messina Mine, for easy victory (but the Sorcerer is susceptible to Stun too).
- The high-level Beastman (Human) enemies in the basement of the warehouse in Miles. See the Walkthough to make it accessible at all times.
- During the Mermaid quest: Pyrohydra in the Savannah: 1109 TP. Respawns as long as you do not take the Eggshell. Arguably the best place to farm TP and techs (TechLV 31) at the same time rather early on, but it is a difficult enemy.
- All Stun/Madden-able Dragons (4444 < 7777 TP), easy as pie with a successful Mad Biter and Sword Barrier. See the Monsters or Bosses sections for who they are and where to find them.
- Endgame: Albion 3949 TP (on Lake Wyringa for example) or Vritra 4103 TP (Salamat or Savannah for example). See the Top Mob Monsters section for how to deal with these powerful enemies.
BATTLE COUNTER OVERWRITE (SFC)
There is only one battle count for events like Workshop research, Throne events, the herbs in Nomad Village or the Destruction of Leon Bridge. That counter overwrites the previous remaining if you mix events, and you can use this to your advantage by starting a Workshop research last, which shortens the time necessary for all the other ongoing events (that usually need 15 battles) to the 5 battles necessary for the research to be completed.
KILL'EM ALL
One of the most unpractical things in RS2 is that you cannot kick recruits out of your party. If you want to change party members, the only way is to LP-kill them. Nevertheless, there are a few solutions to ease the process (beside unequipping all armor and making your characters attack with weapons they have 0 LV for).
For example, you can make the characters you want to keep Invisible and let the other members be the targets of your enemies' attacks.
Even better, in addition, if you have a Darkstone Ring (or several, if you are on a Remaster NG+), sleeping at an inn repeatedly with it will shave off the LPs (to 1 at best) of all characters who are not equipped with it, making it much easier to kill the unlucky, unwanted party members.
The place can matter too: I personally like Ludon Highlands N entrance: it is close to Avalon and there is a Plant enemy (a lot of Plants have Poison attacks, which shortens the killing even further).
INCREASE RARE ITEM DROP
In the SFC days, there were talks about the fact that having common regular drops at max (99) in your inventory increased the probability to have rare items drop. But since base probability was so low, it was exceedingly difficult to confirm (or infirm) and it seems that to this day no one has searched for or deciphered anything related to this in the SFC game code.
In the Remaster Edition, the Bejeweled Ring increases the enemy item drop rate, thus allowing to guess-test this theory. And the fact that drops are strongly influenced by what you have in your inventory seems to be correct (on the Remaster at least). It becomes especially obvious when wearing many Bejeweled Rings (test with 12 Rings). E.g. Have 0 Balms in inventory, battle Beastman: Balms drop. Have 99 Balms in inventory, battle Beastman: Rabbit's Ears drop.
BOOSTED HP GAIN
HP gain when HP levels up is determined by the STA of your character at the end of the battle: it is thus possible to gain more HP than usual by using Dragon Pulse (which boosts all your stats) several times. At max boosted STA (99), the HP gain will be 5 times higher than usual. Concretely, if a character levels up their HP, reload and use Dragon Pulse during the battle at the end of which you know you will level up.
LP RECOVERY WITH MULTIPLE DARKSTONE RINGS (Remaster)
The Darkstone Ring is a cursed, unremovable ring: all party characters lose 1 LP every time they sleep (except in Gerard's bed), except the one equipped with the ring, whose LPs fully recover overnight. This is only a problem if you forget to sleep in Gerard's bed.
Using NG+, if you gather enough Darkstone Rings and equip each party member with one, every time you sleep everyone's LPs will fully recover.
INFINITE MAX REVERSE DELTA (Remaster)
In the Remaster, Reverse Delta (Yo-yo x3) is a RS3-like 'Repeater Tech' for which the relevant LV is the one used by the character (friend or foe) that played just before. That relevant LV stays in use as long as you do not turn off the game. Which means that, in Rapid Stream formation (so as to never let the enemy play), with a proper inital repeated buffing of one character with Dragon Pulse, and if you have equipped all characters with axes and Reverse Delta, they will all deal immense damage, in every battle. If you meet a group of enemies of 6 or more, run away.
DEFEAT KZINSSIE 0.5?
It is quite impossible for Leon to defeat the very first Kzinssie (after Victor's death). In the story, Kzinssie Soulsteals Leon (unavoidable STS Skill) in the turn following that in which you have inflicted 666+ damage. Nevertheless, with the Remaster NG+, it has become less tedious to experience an alternative dead-end.
As Kzinssie has only 42 SP and 29 MP, defend with your best armor (and the highest STS def you can) until he runs out of SP, then start attacking him. Soulsteal has a SP cost of 12, so when the time comes, Kzinssie cannot use it and keeps repeating 'I mustn't falter' endlessly (after his Type Change he has 65,535 HP like the Last Boss, but also an Immortal flag)... A reset is the only way out.
Note that even with STS immunity (STS def > 128), Soulsteals lands (as expected).
KZINSSIE 1 WITHOUT SOULSTEAL EVADE
Related to the previous, there are two ways to beat Kzinssie 1, after Leon's death, without the Soulsteal Evade (erased by mistake or on purpose):
1. Leveling up to the point that you are able defeat Kzinssie before he uses Soulsteal (1300 HP in one turn).
2. Or making it so that he cannot use it (defend and survive until he uses up all his SP), then kill him.
BATTLE KZINSSIE 2 RIGHT AFTER KZINSSIE 1
Normally, you can only battle Kzinssie 2 after you have defeated 5+ Emperors. He'll be in the Sealed Cave unless he is the last of the Seven Heroes.
Actually, Kzinssie's letter of challenge arrives when the Last Emperor becomes the successor as a Time Jump occurs (which is why there is no letter in an Earliest Final Emperor run, for example): if you kill all the successors but one after defeating Kzinssie 1 and if a Time Jump occurs, the letter arrives and you can battle Kzinssie 2 right away as your first Hero fight.
SUPER WRAITH FORM
- Defense-wise, Wraith Form is actually a buff that sets your physical def values to 128. Air Screen or Water Dance cast previously to Wraith Form will strengthen your magic def (but cast after, they will erase the 128 def: be careful!). Your magic def can be boosted by items: on the Remaster, a combination of Fire Circlet, Water Ring, Wind Ring or Rubber Soles, Earth Ring, on a Salamander, Nereid, Iris or Coppelia, can make you immune to 3 magic attributes, or immune to 2 + high resistance to 2 (which is enough to take down all bosses solo, the Last Boss excepted, because Vortex dispels the Wraith Form); on SFC, possible different set-ups use Twilight Robe (or Avalonian/Sun Robe), Rainbow Cap, Rubber Soles, Darkstone Ring, Insulated Clothes.. Note that even if you have 128 def you can still be hurt by No-Attribute attacks (Aim, Wracking, HP Absorb) and attacks that Crit vs. Undead. Being Undead has its advantages, nevertheless: the Wraith form is immune to all Status ailments.
- Attack-wise, you can only use spells (except Reviver, Shadow Servant and Wraith Form again). Wraith Form (UM+TE) leaves you Stone Shower (TE, BL dmg, Pwr 6) or Sandstorm (UM+TE, SL SH dmg, Pwr 4). To boost damage, use Mist Cover (HY) and repeated Dragon Pulse (HY+TE) before turning into a Wraith.
SUPER PHANTOM SOLDIER
You can create a Super Phantom Soldier thanks to Dragon Pulse, the usual Buffs and Amethyst Axe Phantom Chivalry built-in tech. Phantom Chivalry raises all your stats by [(HY+TE)/7]+2 for 1 action, but if you keep casting the spell, its bonuses stack, actually increasing all stats to super levels. You can become invisible for good measure to protect yourself while doing so (Mist Cover or Lady Hawk Feather Cloak). Throw in a Gilden Strength, Water Dance, Air Screen. Then Phantom Chivalry will create and an axe-wielding, exact double of your superbuffed character, on whom you can cast Gilden Strength, Water Dance and Air Screen again. When that double dies, you get your superbuffed character back: just use Phantom chivary again.
EASY LAST BOSS SOLO WITH SUPER PHANTOM SOLDIER
With Mist Cover + repeated Dragon Pulse + Amethyst Axe Phantom Chivalry + Yo-yo.
Hide with Mist Cover and dope your Emperor with Dragon Pulse repeatedly, then create a super Phantom Soldier clone with the Amethyst Axe built-in tech, and happily deal 9999dmg with the Yo-yo tech. The clone will fall eventually, but since it brings you back in the state at the moment you created the clone, you can make a super clone again, and again, until the Seven Heroes are defeated.
HASTEN TIME ABUSE
It is possible, with sufficient MP, to perfectly prevent enemies from attacking your party - all enemies, including all bosses and the Seven Heroes (except Dread Queen in the Remaster edition): just use the Rapid Stream formation and cast Quick Time / Hasten Time at every turn (prevents enemy action this turn) with one character and attack with the rest. Against the Last Boss, your MP may run out before the end of the battle, so possibly use Hasten Time around the time the last of the Seven Heroes appears, or only during critical times.
REMASTER PLAYSTATION TROPHIES & STEAM / OTHER CONSOLES ACHIEVEMENTS
Here is a PSN Romancing SaGa 2 Trophy Guide to Platinium.
If you cannot live without Trophies, I strongly recommend you to leave that for later runs, and play 'blind' first, only using a guide when you are stuck. Here are spoiler-free tips if you need any. Have fun!
Warning: Achievements will prevent you from experiencing and enjoying this game the way it was created for: ground-breaking freedom of play and experimentation through replay. RS2 (and RS3) is really what you make of it, not what people tell you it is: do not let yourself be owned by Achievements.
Please note that, according to behavioral studies, in-game achievements are a contemporary, addiction-creating, gaming bane of the Pavlovian sort (conditioned response to prospective rewarding). They will never make you a better gamer and they will even make you hate the games you play to the grind (long-term aggravation / short-term gratification). Achievement / Trophy hunting is an addiction, i.e. a very real mental illness that impairs your judgment and owns you: please seek help, starting with a quick online search to realize that you are not the only one knee-deep into this plague and that there are plenty of gamers that got over it. Achievements are a trap used by modern gaming industry, that is also at work in all SNS: do not be fooled. Bring the fun back into your gaming!
ITEM VALUE BUG (SFC)
Weapons have two Attack Power values and the effective value is sometimes different (between brackets in the tables below), and some defence item stat-enhacing bonuses to stats are inoperative. In effect, most stat bonuses get -1 to the displayed value, min 0, except Rabbit Ears, Twilight Robe, Power Belt, Rabbit Foot and Candy Ring, that display the correct value. See the Items section for more info.
This was corrected in the Remaster and the displayed values are accurate, except for Sevens Sword 63 (65), Great Axe 42 (41), Feather Boots SPD+4(+3), Power Belt STR+3(+4).
CHANGE MAP BUG (SFC)
Bugs appear if you do between 51 and 65 round trips on the Regional Maps between:
- South Longit ('To Melu') and Melu ('To South Longit'), or
- Austeros ('To Melu') and Melu ('To Austeros'), or
- Jauda ('To Salamat') and Jauda ('To Jauda'),
and enter any location.
Depending what you did and where you went, you can witness interesting occurences in general!
One location (Sunken Ship) is special due to its 2-step access; it allows you to recruit bugged characters and access the Debug Room (see next paragraph).


BUGGED CHARACTERS (MELU/SUNKEN SHIP BUG) (SFC)
Conditions: Sunken Ship open, Mermaid Potion in inventory, 'To South Longit' opened on Melu map, and have a party of 2-4 to recruit a bugged character.
Here is a rather easily reproducible way to trigger Bugged Characters:
- From South Longit Regional Map, do between 51 and 65 round trips 'To Melu' / 'To South Longit'.
- Enter Sunken Ship location (whichever reply): defeat the Human enemy.
- Follow some automatic warps, then: Austeros: enter anywhere: South Longit: enter anywhere: Melu: enter anywhere: warp to Debug Room.
- Forward (A) until you can choose そんな難しい話 etc. (or B button): automatic dance with skeleton.
- Forward, then choose そんな難しい話 etc. (or B button) one more time.
- Forward until 金をおいてけ、でないとズブッ、だぞ: hereafter always choose 金置いて逃げる (A) *** .
- Several battles (vs. Plant in underground Comroon Strait) with the same question and answer (A), until: Comroon map: enter anywhere.
- Through the Steppe with Hunter: Accept (パーティに入れる) to recruit a bugged character (if party < 5).
- Battle with Sorcerer: Retreat (or Victory or Emperor LP = 0): Succession Screen: done!
*** If at this point you choose the other option 教訓をあたえる: battle with Human enemies: Retreat from battle: you can move about the Debug Room, open a menu and fight enemies.
Walk-through in pictures:


The Debug Room:


Notes:
- Which Bugged Character you get depends on whom you talk to before triggering the Melu/Sunken Ship Bug. You must talk to: one recruitable character first, then one Fusion Spell character (do not learn the spell). This combination of two characters determines the Bugged Character. There are 256x256= 65,536 combinations! The recruitable character you talk to decides the Bugged Character's appearance, here they all are:

- Some Bugged Characters will make the game crash on several occasions (some due to their name).
- Most Bugged Characters are not actionable and cannot be used in battle. Here is a list of controllable characters (more interesting indeed).
- Some other Bugged Characters are invisible on the Local/Adventure Maps and can move freely over any terrain, only responding to actionable objects (signs, NPCs, chests..) and exits. These characters are note-worthy because if you make them Emperor you can access places your regular characters cannot - especially exits hidden by decorative objects! And while exploring thus, you realize that the chests in Avalon Storeroom are just decoration, that the window you can see in Avalon Castle 2F (a direct access to Cat's hiding place?!) is actionable indeed but unfortunately walled, that you can access and visit Avalon's discarded Library (where the orchard is in the Remaster), that you can bypass Leon's decree 772 (which apparently concerns only the door) to access the Sealed Cave entrance behind and the underground section under the stone pillar (no enemy beyond) up to Kzinssie already there at the very end but that there is nothing under the grave he stands on, that in the same way you can access the Termite Den in Avalon but that the Real Queen has yet to grow, that the 4th tower in Teretuva is a fake, that at the Great Wall the tunnel entrance is still under the stone but that there is nothing at the end of the tunnel anyway, that evidently you still cannot access Cape Chalier from Nuono, that there are two entrances into Iris Village atop Mt. Chikapa, that around some specific changing tiles (footsteps in the snow) you can see all tiles in turn, that you can access Subier from the regular iced Nazelle Strait, that the guard walking on Castle Nerak walls is not exactly talkative, etc., etc.!


More pictures of the Invisible World Tour:


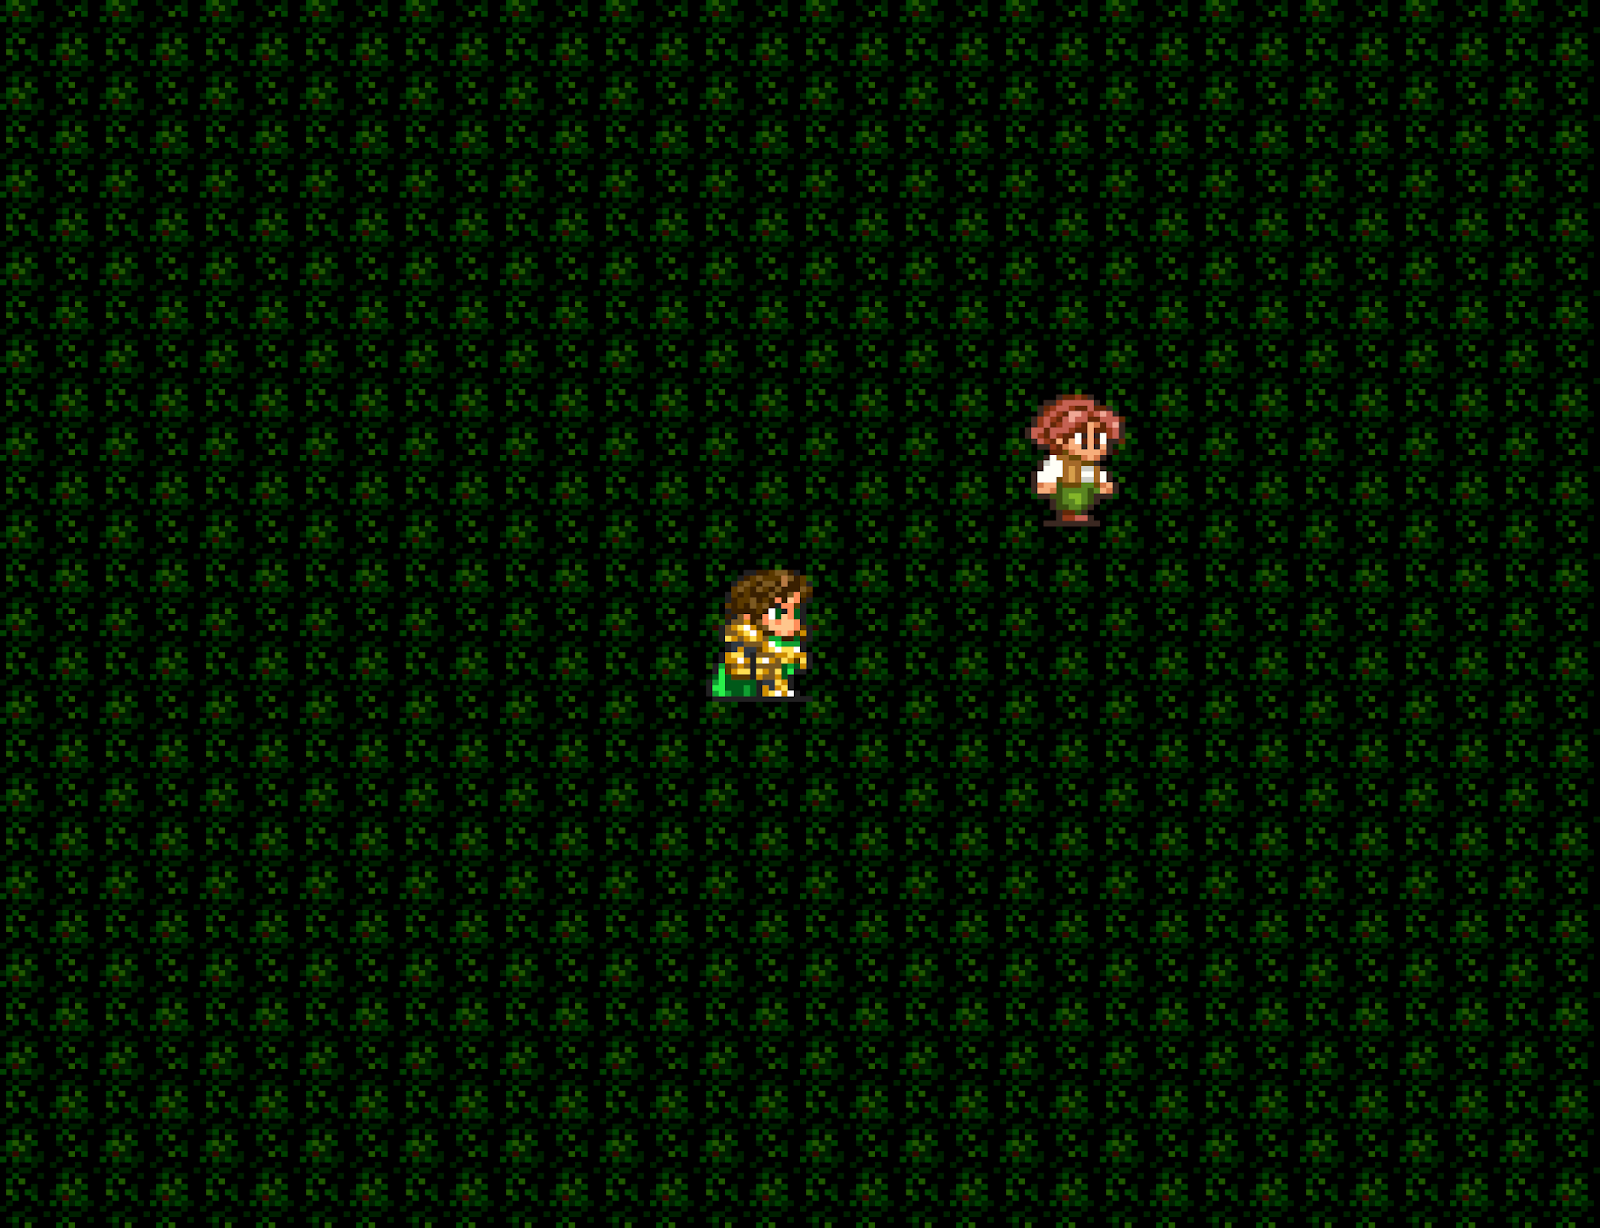
MORE: THE DEBUG ROOM (SFC)
Mentioned above is the 100% repeatable way to trigger bugged characters, but there are actually other, less reliable ways to do so.
For example, make emperor / kill off 7 characters of a class, then on the 8th one, save, turn the console off. Turn the power on, reload, kill off that emperor: a bugged character may appear in the succession panel.
All sorts of exploits or interesting situations are actually possible (finish the game with Leon, or Gerard, have 9999 years, a Salamander with Dark Magic, liberate Cumberland with Harold, etc.), depending on when you make those bugs happen.
Additionally, most of those make use, in one way or another, of the Debug Room.
See the previous section above to reach it. Once you are there, save and reload your game to clean things up.
Try pressing the X button to access the Debug Menu, where you can turn on or off three modes: Debug Mode (high speed), Battle Cancel (no battle), B Button to Ignore Obstacles (B button allows you to go through anything, like invisible bugged characters described in the Notes above).
The Debug Room itself consists of all enemy symbols (which you can battle) and of warp zones (the dark green patches of grass) to many locations, including Emerged Island and Last Dungeon (you can thus get both Salamanders and Dark Magic, or finish the game without defeating all Heroes).
Have fun!


DATA CORRUPTION BUG (SFC)
(By Alex Jackson, as quoted in M. Baker's RS2 Guide on GameFAQs.)
"This is a memory-corrupting glitch like the one with the Sketch command in FF3US, so I suggest making a backup copy of your .srm file (assuming you're playing on an emulator) before you try to reproduce it. The following spells must be available in your Magic Lab to activate the glitch: Reviver (ultimate Fire magic), Wraithform (Earth/Dark fusion magic), and a total of seven or more Water spells (regular and fusion).
1: Teach any character the "Wraithform" fusion spell (if they don't have skill in both Dark and Earth magic, you'll have to first teach them one non-fusion spell of each).
2: Fill the character's remaining seven magic slots with Water magic (any will do, regular or fusion).
3: Teach the character "Reviver". The game will ask if you want to forget all your Water magic; say yes. Now the only magic the character knows will be Wraithform and Reviver.
4: Get into a battle, and have the character cast Wraithform in the first turn.
5: In the second turn of the battle, when the character's turn to input a command comes up, the game will glitch up with varying effects. Sometimes it'll lock up completely, but usually you'll be able to press B to return to the Emperor's command menu and select "retreat" to exit the glitched battle. After the battle you may have items added to (or missing from) your inventory, screwed up game status (income, state of conquered/unconquered regions, etc.) and so on.
You can also trigger the glitch using Shadow Servant instead of Reviver. In this case you would fill all the character's magic slots with Light magic, teach them Shadow Servant to erase it all, then finally teach them Wraithform.
The reason this glitch occurs is that a character under Wraithform's effect can't select any command except magic, and there are a few spells (namely Reviver, Shadow Servant, and Wraithform itself) which they can't use either. The important point is rather than being greyed out, the unavailable spells are completely removed from the character's command menu. If you set a character up so that the only spells they know are ones that can't be cast in Wraithform, then they will have no valid commands at all and the game will glitch as it tries to draw a completely empty menu."
[End of quote]
CRASH (SFC)
As a curiosity, and because they are beautiful too, here are a few screenshots taken after the game crashes, as it sometimes happens, during the Change Map Bug.


CHEAT CODES
I don't play with codes but here you are if you do:
http://wraum.jp/c_rs2.php
https://web.archive.org/web/20150318040940/http://tyakata.com/romancing_saga2.html
https://gamefaqs.gamespot.com/boards/588633-romancing-saga-2/72332793
DISCARDED LIBRARY (SFC)
All references to it were erased in the Remaster edition, but if you play the original SFC game, you may wonder what you should do when the University Dean complains that there are too few books and that you should build a library...

At some point in the original SFC game, a Library was supposed to be in S-W Avalon (where the Orchard now stands in the Remastered Edition), with its underground exit like the other extra buildings. Here is an actual in-game map of the Library, which is accessible with special characters (Debug Room or Invisible Emperors, see above). A shame you can't do anything in it!


SIDE NOTE: TRIGGER FOR A GHOST (Remaster)
There were still questions (and wrong info everywhere, including in all the Japanese reference sites) about Victor's Ghost Quest Trigger, so I decided to test it myself and show here how I proceeded. The invisible work for this site usually translates in just a few lines in the walkthrough (a couple of sentences for this particular case for example) but it's a very tedious and very time-consuming work, especially as I only have access to the Remaster for iOS, and the phone version controls are just horrible. Anyway!
Starting elements:
- In-game hints (NPC): 'Peace and a unified continent. A union of friends and allies...'
- Verified trigger conditions: Final Ruler, solo or party.
- People say that you must annex every region and unlock every class, BUT there seems to be exceptions.
- Salamanders are not needed to complete the achievement (you can trigger the Ghost after the eruption), but must Comroon be annexed to trigger the event?
- You may not need to annex Salamat or Jauda to trigger the event?
The main point is to determine if annexion is among the conditions to trigger the event, or not.
My hypothesis: Annexion is just coincidental to possible recruitment (you must annex to be able to recruit): to trigger the appearance of Victor's Ghost, you must simply have talked to all possible recruitable classes.
1st Step: check for each Class if their recruitment entails annexion:
Heavy Infantry / Light Infantry / Ranger / Court Mage --
Mercenary = Annex N Varennes
Amazon -- (with Female Emperor)
Armed Merchant = Annex N Longit
Brawler --
Crusader = Annex Cumberland
Desert Guard = Annex Melu
Diver = Annex S Longit
Diviner --
Hunter = Annex Savannah
Imperial Guard -- (Throne Event: annex 8 regions)
Iris --
Levante Guard --
Mage for Hire -- (Throne Event)
Mole --
Nereid --
Ninja --
Nomad = Annex Steppe
Saigo Clansman = Annex Ludon, Nazelle
(Salamander)
Strategist -- (Throne Event: annex 4 regions)
Vagabond = Annex S Varennes
Conclusion 1: You don't have to annex Salamat or Jauda if it's only unlocking all classes (minus Salamanders).
2nd Step: check if the annexion of Comroon is necessary or not.
Testing: Started a NG+, played in order to recruit everyone without annexing Salamat or Jauda (possibly leave the Diver / Subier for the Last Generation, easier to trigger) and if possible without killing Heroes (negotiated with Noel). Didn't touch Comroon (except to complete the Bard Quest to be able to recruit Iris). Prepared for the Last Emperor (VERY time-consuming, had to kill off nearly 300 Emperors..), Saved, triggered the Last Emperor, took care of Subier.
Ofc, nothing ever goes smoothly and some things were in the way (Garon, Termite Invasion) but noticed extra factors thanks to that, and tested those too (cannot trigger during Garon or last stage of Termite Invasion, infos I had seen nowhere before). Saved and tried Dark Magic Route at various stages (without annexing), to no avail (no Ghost); Reloaded and saved the Salamanders (no Ghost: Salamanders are not a trigger) and annexed Comroon (Ghost, OK!).
Then came back to the Save before the Last Ruler, annexed Comroon (froze the lava), unfortunate but inevitable Jump due to killing Emperors (like earlier, but I would have liked to test without Comroon2 triggering, although it's an occasion to see if this quest interferes or not), Last Emperor, Subier & Diver, and... OK, so you don't even need to complete the second Comroon Event. This also shows that this can be triggered by an Early Final Emperor (Noel, Rocbouquet and Wagnas are still undefeated here). The experiment ends here! (at last!...)
Final conclusion: To trigger Victor's Ghost, you must have unlocked and talked to all recruitable classes except Salamanders (oh, and Coppelia), and you must have annexed Comroon, be it during the first (Ice Seed) or second (Battle of the Rock) time around.
PS - This would also mean that an Earliest Final Emperor cannot trigger this Event - at least for Female, since she cannot recruit Nereid (no Mermaid) - but this needs double-checking (is killing Queen and talking to the Mole before repopulation enough to make it considered recruitable? On SFC at least, the Mole does not appear in the New City, which would hint at a negative answer).

GLITCHES
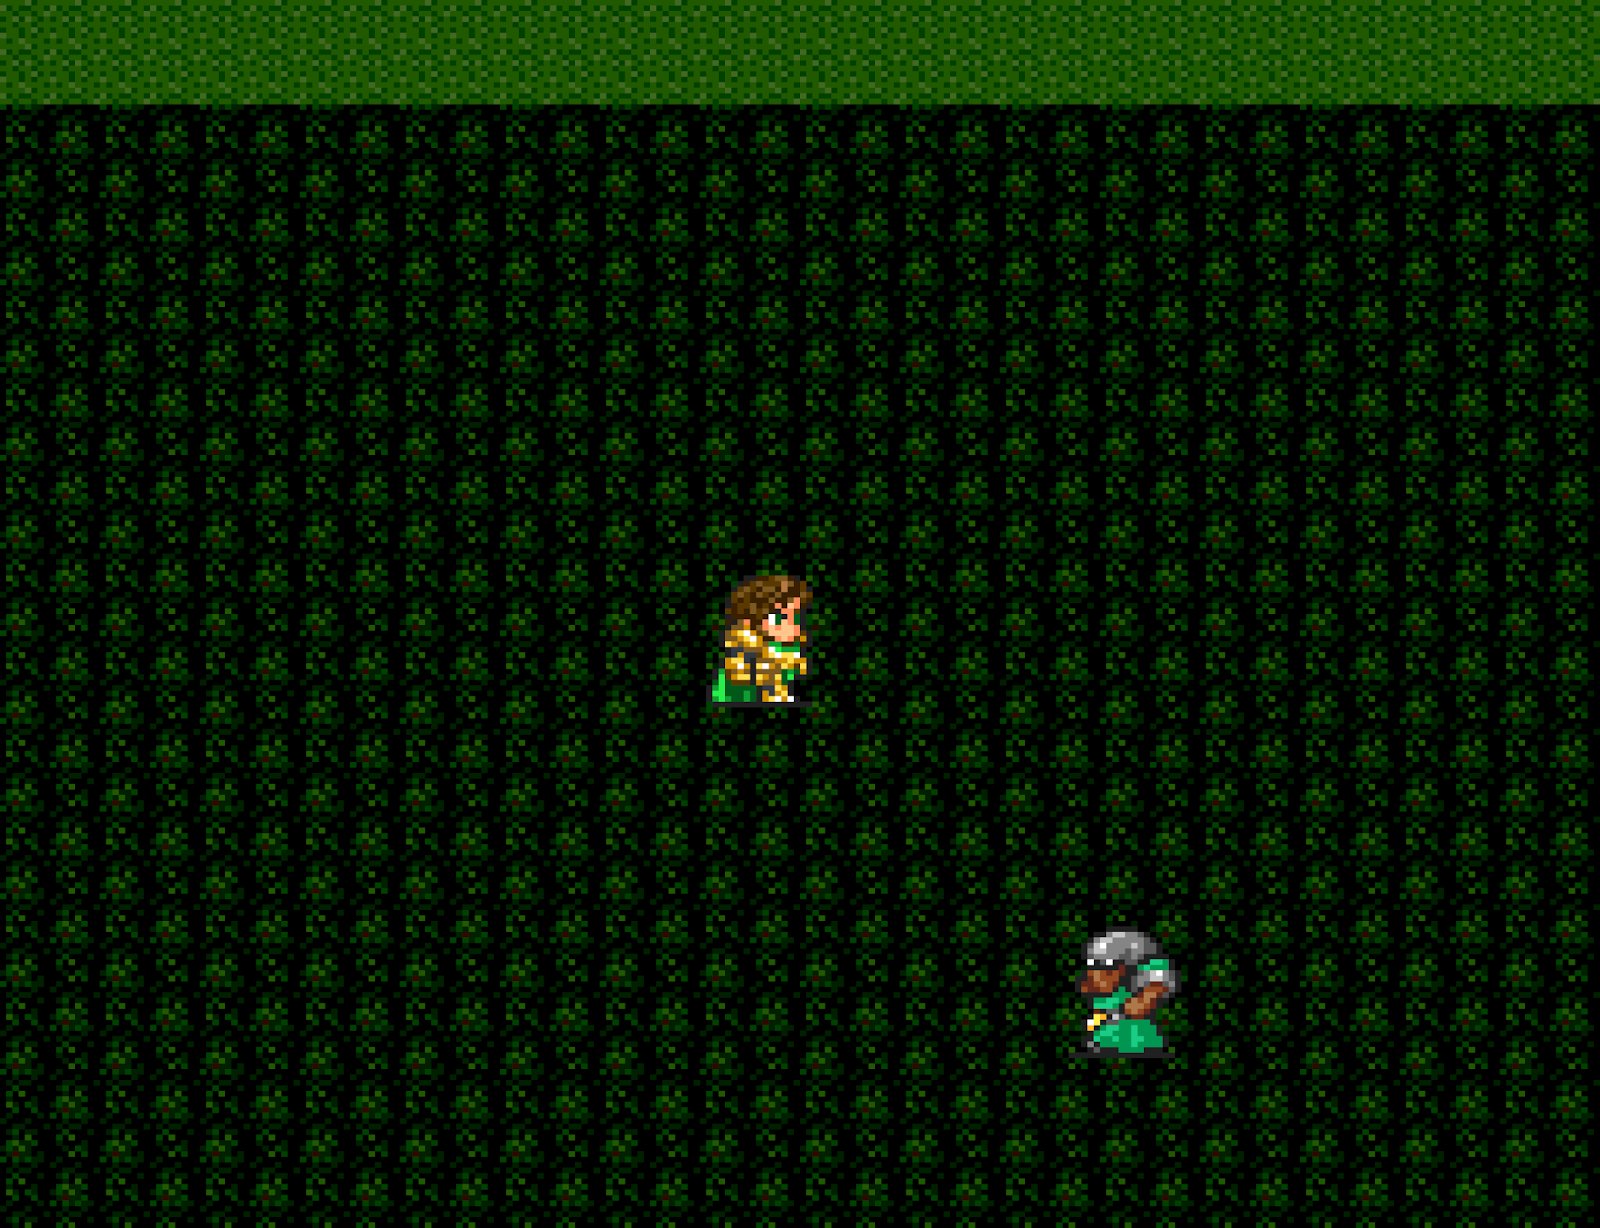
GOBLIN INVASION MAP STROLL (SFC only)
After Leon's death, during the Goblin Invasion, reach the entrance of Avalon Town: usually you cannot exit town, but if you get sandwiched between the exit and an enemy and defeat it, you can move about the bottom of the map. Some glitches happen too.
Note that you can use this trick (being pushed back after battle) to reach the Sunken Tower while its access is still restricted.


EMPTY CANAL FORTRESS
If you pay the man in the bar to find a way into the Canal Fortress, leave and come back to the bar, he will have found a way and take you out at night. Outside, just after the 'Follow Me' line, save your game, reset and reload: the man is now at a different place than usual and leaves the way open. Talk to him once more only ('Hurry up! We'll be found out!') so that the boat appears: now you can ride it wherever you like around town. Including behind the Gate: enter the Fortress to find that there is no enemy inside except the boss.
The Canal Fortress also empties if you defeat the Gate at night, leave the Map and immediately enter the Fortress.
Both situations are linked to a loophole in the various States of the Canal Fortress.


MIRAMAR MAP STROLL
Before the construction of the Leon Bridge, if you take the ferry boat and if there is a NPC at the disembarkment spot, you stay in the boat and can move about freely!


HOFAH MAP STROLL
On the same generation as Cumberland opens, make an Armed Merchant your Emperor without Time Jumping. Then go to Cumberland and open the sea route to Tsukijima, and make Cumberland fall (the shortest being probably to choose Thomas, find him, then choose to go back to Avalon). Now access Hofah from Tsukijima, and when you disembark the sailor is not there: you can freely board the ship again and move about Hofah!


FIRE DRAGON FLOOD BUG (SFC)
One effect of the Fire Dragon Flood tech is raising all party stats. When you sparks this tech, this effect might be drastically increased (stats + MaxHP/4 + 4), leading to a single Punch doing 9999 dmg. Succeeding in sparking this tech during the Last Battle considerably shortens it..
BOKHOHN LAST IN THE STEPPE
When you can, bring the fake Imperial Landship to the Steppe, then defeat all Seven Heroes except Bokhohn, including Kzinssie in the Sealed Cave: you can still access his Landship as usual and beat him there. And even though you have already defeated Kzinssie twice, he will be the one Hero waiting at the end of the Last Dungeon.
NOEL LAST IN THE WANDERING LAKE
Leave Noel and Rocbouquet for last, then defeat Rocbouquet: a revengeful Noel will be at the Wandering Lake as usual for you to battle. And even though you have already defeated Kzinssie twice, he will be the one Hero waiting at the end of the Last Dungeon.
DUNE WORM AGAIN
It is possible to battle the Dune Worm in the Tunnel under the Great Wall more than once.
In early Cumberland, find Thomas and bring him back to Cyfreet, follow through to killing the Duneworm, and party-wipe or LP-kill your Emperor before rescuing Thomas: Cumberland falls, and the Dune Worm is back!
And if Cumberland has fallen already, defeat the Dune Worm, party-wipe or LP-kill your Emperor in Douglass or Hofah (not against the Demon in the castle), and the Dune Worm is back! (and again and again ; )
FIGHT MIMICS ENDLESSLY (SFC only)
If for some reason you want to fight plenty of Mimics in Kzinssie's Mansion, just save game, reset, and reload game so that the mimics repawn in their chest.


SAVE, RELOAD & SWITCHES
There are a number of features or glitches related to saving/resetting/reloading.
When you save your game, reset and reload, be careful when around switches: they are all reset and you must push them again (Goblin Hideout, Firn Ruins, etc.). Something similar happens in the Fight Mimics Endlessly phenomenon above (SFC only).
UNDERGROUND CEMETERY / AVALON TERMITE DEN ENTRANCE SAVE GLITCH
Another one with the Last Emperor: If you open the entrance of the Termite Den in Avalon Underground Cemetery, Save, Reset and Load, the entrance is closed and the only way to open it is to leave the room and re-enter. (Not corrected in Remaster edition.)


HEADLESS QUEEN ALIVE RELOAD GLITCH (Remaster)
This one is a new glitch: just after killing the Real Queen (her body goes grey), Save, Reload and her body is alive again!


A NOISE (Remaster)
In the Child & Mu Calf quest and dungeon, you can hear the Mu's cries... even if the child and Mu are not at the end of the cave (which happened to me as I headed into the dungeon when the Saigos had crossed to the other side of Nazelle Strait; I wonder how that could happen; a Generation Jump may be needed)..
PRISMED WAGNAS (Remaster)
There are also a bunch of new visual glitches, like when you use Prism Light against Wagnas..

TALK & ESCAPE
If you talk to a NPC outside in Avalon, Somon, Ostro, Nomad Village or inside a house in Altanticus, close the conversation bubble (the NPC moves again) and leave/escape the place (X button), at that moment the NPC you just talked to will face the direction they would if they had been talking to you at that moment!


SHOOT THIS CLUB!
If you use the Ozone Beat tech (Club), there is one image in the sequence, that should probably not be there: when you hit the target, it's with an arrow first! (center pic below) before it reverts to a club. Or maybe there's a knee joke somewhere?


A DOOR MUST BE EITHER OPEN OR SHUT
If you start a battle just as you go through a door, once the battle is over it may be stuck open..


INVISIBLE SOLDIER
In Cumberland, after Harold's death, you are looking for Thomas. If you meet Georg and go back and find Thomas, the soldier who comes at Thomas' hiding place is invisible!

INCORPOREAL KID (Remaster)
The first time you reach Tsukijima when Mt. Comroon is about to erupt, you cannot talk to the kid running around, who can actually run right through you..

OFF THE EDGE
After freezing the lava, you can walk over the edge of the N-E corner of the island of the Room of Records in Zemio.

I CAN SEE YOU
In the Last Dungeon, not all walls look as concrete as they should be, and you can spot some visible bits of you in some places.

DETAILS
BARDIC CHEST
You can actually grab the content of the chest guarded by the Boss (or Dantarg) at the end of the Bardic Grotto - from above (behind)..

SEVEN HEROES TRIVIA
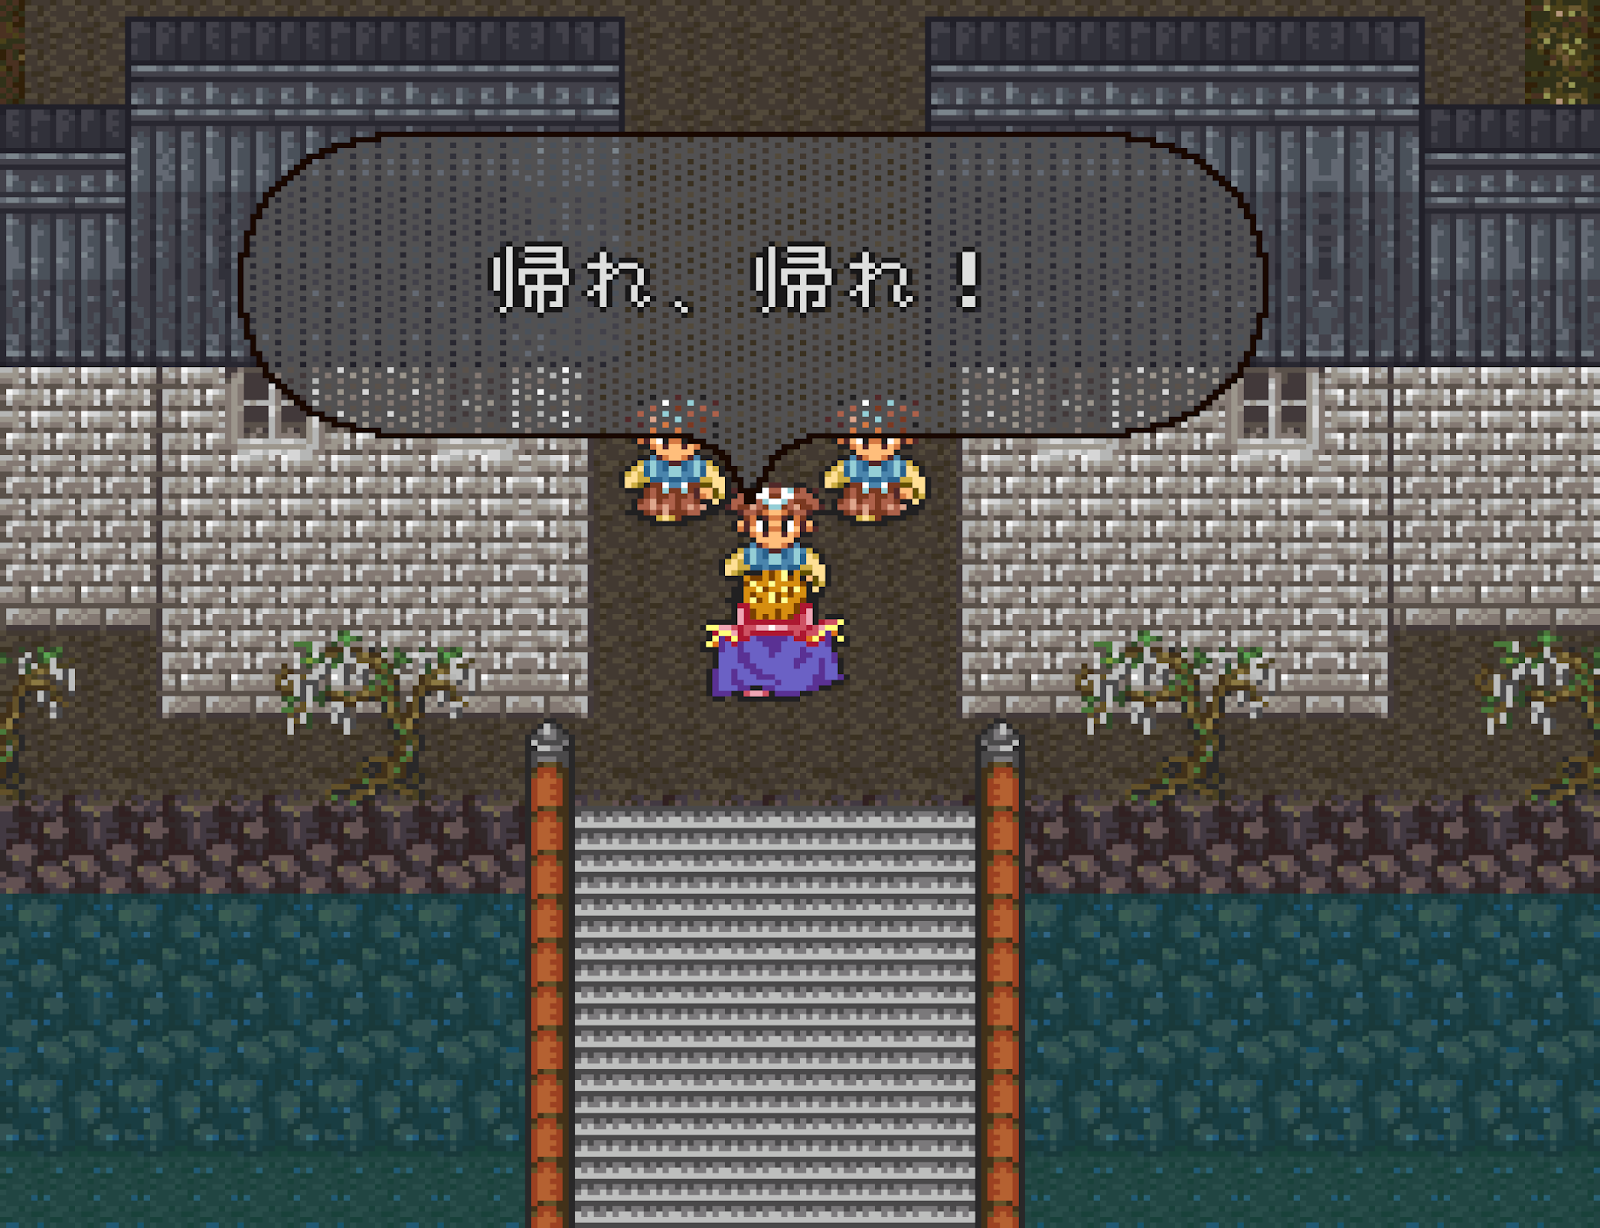
The names of the Seven Heroes actually do not mean anything and simply come from the names of stations of the Yamanote Line in Tokyo, backward and adapted: 新宿 (Shinjuku) gives クジンシー (Kujinshii / Kzinssie), 恵比寿 (Ebisu) スービエ (Suubie / Subier), 五反田 (Gotanda) ダンターグ (Dantaagu / Dantarg), 上野 (Ueno) ノエル (Noeru / Noel), 新大久保 (Shin Ookubo) ボクオーン (Bokuoon / Bokhohn), 池袋 (Ikebukuro) ロックブーケ (Rokkubuuke / Rocbouquet), and 品川 (Shinagawa) ワグナス (Wagunasu / Wagnas).
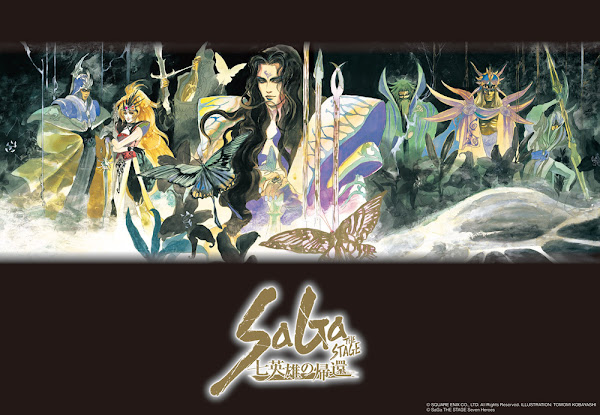
The origin of the Seven Heroes is related in the theatrical play SaGa THE STAGE ~七英雄の帰還~ (The Return of the Seven Heroes, 2018-).
EMPTY NAZELLE
If you reach the stage of going to battle Subier in the Frozen Sea without ever having reached Nazelle through Ludon Highlands, and if you disembark at the thawed Nazelle Strait and leave the map, you reach a completely empty Nazelle Region! Not even the Nazelle Strait where you came from is there.. (B Button to go back to Nazelle Strait.)


CRUISE IN THE FROZEN SEA
If you trigger and defeat Subier in the Frozen Sea before starting the Armed Merchant quest, then steal the Armed Merchant ship, you can go back to the Frozen Sea / Nazelle Strait by ship and have a more relaxed look around the area where Subier used to be. Although there is not much to do there!


THE LONG WAY ROUND
It is evidently possible to reach the Eastern continent without clearing the Canal Fortress: from Varennes, work your way South (Dragon Lair/Fiends' Cloister, Ludon Gemstone Mine, Ludon Highlands, Saigo Village/East Oubliette) to open the way to South Longit (Toba, Atlanticus, Witch's Sanctum where you must buy a potion) and Melu, from where you can go anywhere except North Longit. Including to Cumberland from Miles! even before King Harold's letter reaches you..
CATMAN?
After Cat offers her help and goes to the Pub of the Canal Fortress, do not talk to her but break the Gate open. Then leave to the Regional Map, come back to the Canal Fortress, enter by the main door, exit through the Gate now respawned and enter the Pub: Cat and the 20kG Man are now overlapping! Cat replies if you talk to them, and leaves to the house next door. You have to get out and in again to be able to talk to the 20kG Man, and can choose to go that way if you prefer, even after opening the underground passage with Cat.


UNTOUCHABLE
In a few specific places enemies cannot reach you (much like Fish cannot go out of the water).
For example the door frames for the Gold Dragons in the Firn Ruins.
Sometimes it's due to specific enemies' specific movement patterns (Fairies).


THRONE & MENU
If you sit on the throne, sigh and confirm, then go to the Select Menu and come back, it is as if you had just sat on the throne and you get to sigh again before being able to do anything else.
MOON INNS
There are a few inns where you can fill the Mole Pot with moonlight, and they are named after their respective moonshine period: the Full Moon Inn (Avalon), the Half Moon Inn (Douglass), the Crescent Inn (Miles, JP: Mikadzuki, Crescent Moon). But only the one in Avalon will fill your Pot full, and in one go!


MULPTIPLES
A few quest items you can gather more than one (up to 99), like Eggshell or Seabreeze Shell.
Although it is pointless to do so!
FEW OR MANY?
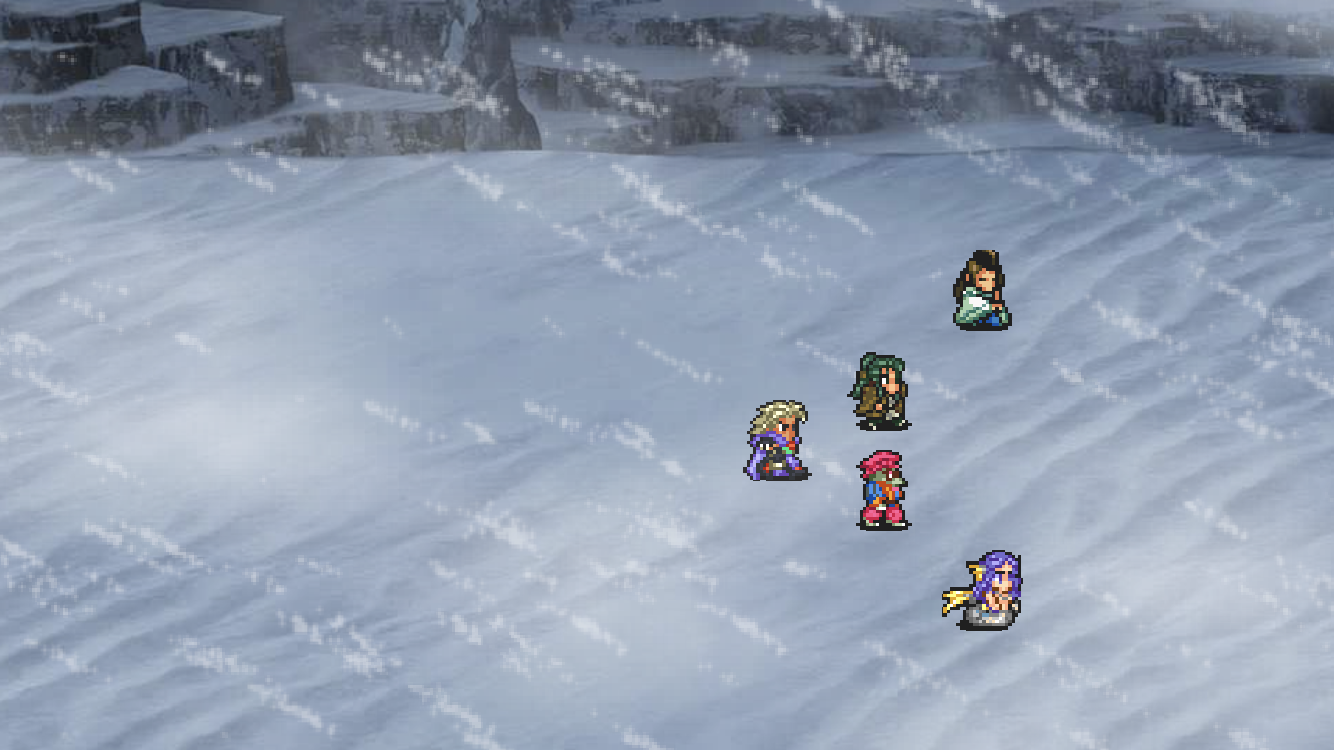
There are a few places where the quantity of enemies varies (Few or Many), such as the Witch's Sanctum, Savannah or Snowdrifts..

THE HORSES ARE GONE!
During the Goblin Invasion and the Vagabond / City Thief Cat Event at night, the horses are not the stables.


IMMORTALS?
A few characters survive through the ages when some event is triggered but not completed: Cat after she has opened the hidden entrance and you have fought the Gate; Thomas after the fall, waiting for you; Carl after you defeated Gel Matter but not the Fiends' Cloister's boss; Henrique and the Armed Merchants discussing in Mobelm; the Child and his Mu Calf waiting to be rescued, etc., etc.!
NOEL ON A LOOP
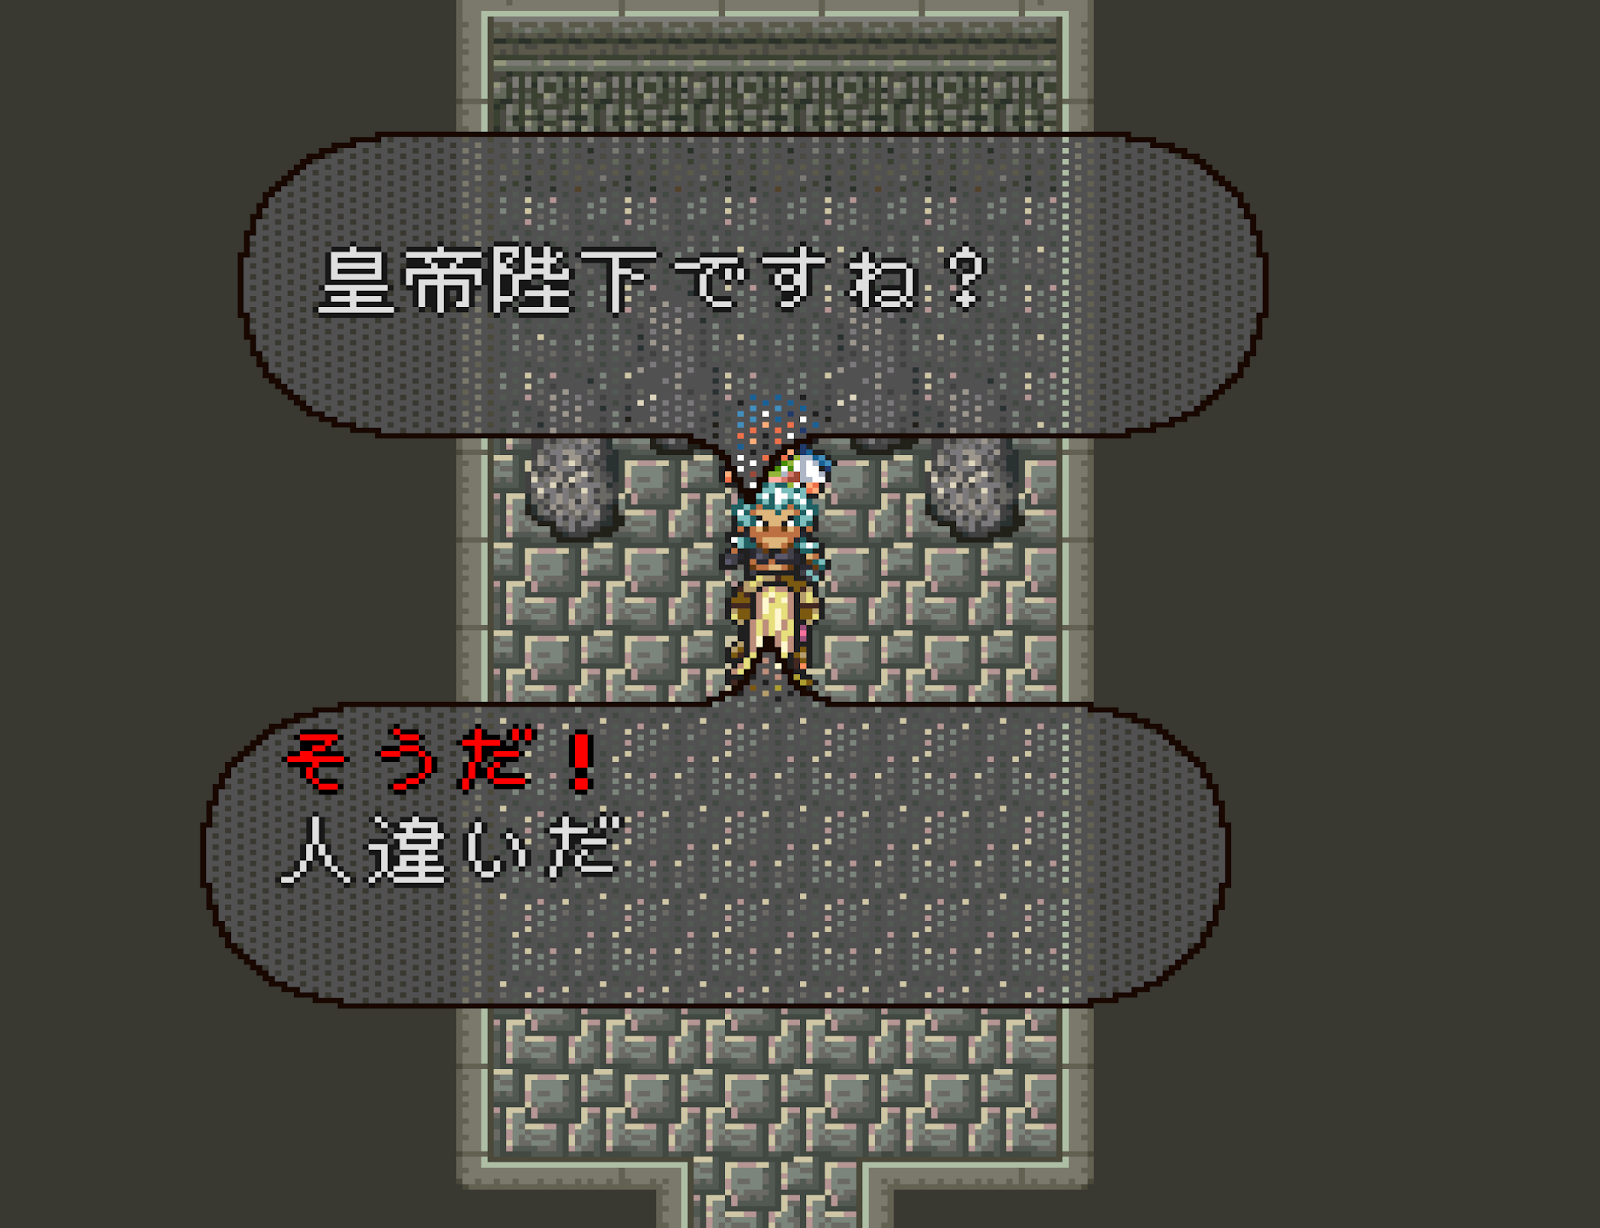
If you have defeated Rocbouquet, cleared the East or/and West Tower(s) in Teretuva and go see Noel in the Wandering Lake, he asks if you are the Emperor and you have the choice to say you aren't and (apparently) walk off. But the trigger of the dialogue is stepping on an avoidable tile at the entrance of the room: as you try to leave you step on it and trigger the conversation again: you are stuck in a loop, in spite of the question: revealing who you are and battling with Noel is the only way out.
Note that after saying to Noel that you aren't who you are, you can talk to Sagzaar, who tells you about the Loess Ruins.


IN THE WAY
If you didn't talk to Orieve in the Forgotten Town before reaching the Last Emperor, she comes to explain things to you in Avalon. At that point if you trigger a Throne Event, she seems quite in the way of the official who comes to respond to your call..

SMALL TALK BEHIND THE COUNTER
When you can talk to a bartender, an inn or a shop keeper otherwise than over their counter, their conversation changes. The inn keeper in Mobelm is quite funny. (Note that the Remaster translator invented a line, something about her wig being heavy, whereas she just asks you not to tell anyone about her disguise.)


UP AND DOWN AND UP AND
Down go the magic rock elevators in the Last Dungeon. Or is that a Whack-a-Mole device?

IRIS THIS WAY
In the Iris Village atop MT. Chikapa, an Iris blocks the way to Torrence, who lets you through once you defeat Wagnas. Coming from Torrence, if you talk to the Iris from the right, she means to move but you are in the way so the way stays shut. On the other hand, if you talk to her from the left or from below, you can make her move twice.


A THIEF IN THE WALL
In the Thieves' Guild , if you talk several times to the thief that blocks the entrance to the sewers, he will end up in the opposite wall..


NINJA CAT
If you try to break through the Canal Fortress Gate while Cat is waiting for you in the Bar, and talk to her, she gets angry and leaves. Now when you leave too you can have a glimpse at her behind you as you open the door.. Scary!

ARE∼
When you reach Nuono for the first time and through Cape Chalier (or during Garon's coup), the sailors are surprised then flee when you close the conversation bubble; strangely enough, only the woman in the bar does not even wait for the conversation to end to run away, before freezing a few steps away..

FLEE BUT IN LINE
In the same occasions as above, the macho sailors run away shamelessly (and funnily) when you talk to them. You can actually make them do all sorts of things..


GARON SIDELINES
If you surprise-attack Garon through Cape Chalier, not only can you wander around Nuono before going to Garon, but after battling and defeating Garon you can also avoid the two Human enemies that come after you, either by outrunning them, or by entering any building (they are nowhere to be found when you exit the building). You can also decide to run for a bit, then fight them here or there, or get them stuck and watch them struggling..


ZOMBIE DANCE
Monsters have a life too. And if you watch from far enough without scaring or provoking them, you can have a glimpse of it. Like those Zombie enemies Thriller-dancing left and right in rythm, yeah!

THE CONVEYOR BELT OF HORROR
Can it get scarier than a tireless monster chasing you on an infinite conveyor belt?


MERMAID STONE DANCE
If you think you've seen everything, try dancing with the Mermaid with the Stone Boat in your Inventory. The Emperor is having a hard time keeping up with the young folk, haha.


MRS. RABBIT
Mary in a full Rabbit set! That's just Rabbit Ears, Armor and Foot. I wish it would do something special!
It's still an interesting set, that gives you good defense against Cold and Status, immunity against Blindless, Paralysis, Poison and Sleep, and a whooping +5 Logic, from which we may infer that rabbits are really Dark Creatures, haha.

WHAT A FINE TREE!
The small tree sapling planted in the Avalon Orchard at the beginning of your adventure can grow and reach a majestic size!

HAPPY 2023!
Happy New Year! 2023 is the year the Empress Romance Song SaGa defeated the 7 Heroes!
It's also the Year of the Rabbit! (see two paragraphs above).


INTERGENERATIONAL
Here are all 256 characters of the game! (SFC version).
A colorful intergenerational rainbow and family tree : D

A NIGHT AT THE INN
Because heroes have to rest from time to time too!
Although there are rarely enough beds for everyone..
 Atlanticus |
 Avalon (1) |
 Avalon (2) |
 Avalon (3) |
 Bihara, Teretuva |
 Douglass Castle (once only) |
 Douglass, Hofah, Somon |
 Eirunep |
 Miles, Miramar |
 Mobelm, Tefal |
 Nibel, Toba |
 Nomad Village |
 Ostro, Ponente, Saigo Village |
 Tsukijima |
 Yuyan |
Sometimes you lie down but you just can't sleep!
 Avalon (Thief's Hideout) |
 Forgotten Town |
 Landship |
 Seer's Citadel |
 Somon (Hiraga's house) |
 Somon (Kzinssie's Mansion) |
 Tsukijima (Mayor's House) |
 Even Leon in his own bed (Avalon Castle) |
BATTLE BACKGROUNDS
ORIGINAL SFC BACKGROUNDS
Here are the numerous backgrounds where the heat happens!
 Avalon Castle (inside) |
 Avalon Castle (outside) |
 Avalon (Sewers 1) |
 Avalon (Sewers 2) |
 Avalon (Termite Den), Termite Den | |
 Canal Fortress (inside 1, outside 1) |
 Canal Fortress (inside 2) |
 Canal Fortress (Gate) |
 Canal Fortress (outside 2) |
 Cape Chalier | |
 Castle Chonto (outside, ground) |
 Castle Chonto (inside) |
 Castle Chonto (outside, tower) | |
 Castle Hakuro / Floating Castle (inside 1) |
 Castle Hakuro / Floating Castle (inside 2) |
 Castle Hakuro / Floating Castle (outside, terrace) |
 Castle Hakuro / Floating Castle (outside) |
 Castle Nerak (inside) |
 Castle Nerak (outside) |
 Cave 1: Avalon Underground Cemetery, Bardic Grotto, Child and Mu Calf, East Oubliette, Fiends' Cloister, Goblin Hideaway, Great Wall, Salamat Jungle, Sealed Cave, Watchman Nest |
 Cave 2: Dragon Lair |
 Cave 3: Mt Chikapa |
 Cave 4: Bardic Grotto (water), Sealed Cave (water) |
 Cave 5: Cape Chalier | |
 Douglass (Castle) |
 Douglass (Castle B1) |
 Douglass (Forest), Path from Douglass to Castle Nerak |
 Douglass (Thomas' Hideout) |
 Eirunep Shrine |
 Eirunep Tower, Teretuva Tower, Sunken Tower |
 Emerged Island (inside 1) |
 Emerged Island (inside 2), Firn Ruins (2), Loess Ruins (2) |
 Emerged Island (outside 1), Gelid Ruins (outside) |
 Emerged Island (outside 2) |
 Firn Ruins (1) | |
 Fort Cyfreet (outside) |
 Fort Cyfreet (inside) |
 Fort Cyfreet (pier) | |
 Gelid Ruins (inside 1), Loess Ruins (1) |
 Great Wall |
 House: Avalon, Miles, Somon (Mansion) | |
 Landship (1) |
 Landship (2) |
 Last Dungeon |
 Last Dungeon (Last Battle 1) |
 Last Dungeon (Last Battle 2) | |
 Ludon Highlands, Mt Comroon |
 Melu Desert, Loess Ruins (outside) |
 Mine: Gemstone Mine, Messina Mine |
 Mt Comroon (Stone) |
 Mt Chikapa, Snowdrifts |
 Nazelle Strait |
 Nuono (grass) |
 Nuono (house) |
 Nuono (road) |
 Nuono (ship) |
 Salamat |
 Salamat (water) |
 Savannah / Steppe (1) |
 Savannah / Steppe (2) |
 Seer's Citadel (inside) |
 Seer's Citadel (outside) |
 Ship: Comroon Strait, Frozen Sea, Lake Wyringa, Nazelle Strait |
 Ship: Comroon Strait (cave), Waterway Maze |
 Sunken Ship (outside) |
 Sunken Ship (inside) |
 Sunken Ship (Subier) | |
 Toba (cliffs) | |
 Town 1: Avalon (1) |
 Town 2: Avalon (2), Somon (1) |
 Town 3: Avalon (3), Douglass, Somon (2) |
 Town 4: Avalon (4), Douglass (2) |
 Town 5: Miles |
 Town 6: Teretuva |
 Trader Ship (Armed Merchant Ship) |
 Wandering Lake |
 [Ending BG] |
 [Ending BG] |
 [Bugged only?] |
REMASTERED BACKGROUNDS
The Remaster has new HD battle backgrounds.
They are both more varied (e.g. by comparison on SFC one cave BG is used for several caves, whereas in the Remaster they are all different) and less varied (on SFC there can be several BG for the same local map but in the Remaster there is usually one BG for one map).
 Avalon |
 Avalon (Sewers) |
 Avalon (Castle) |
 Avalon (Termite Den) |
 Avalon Castle (Victor's Ghost) | |
 Bardic Grotto | |
 Canal Fortress (Gate) |
 Canal Fortress (outside) |
 Canal Fortress | |
 Cape Chalier |
 Cape Chalier (cave) |
 Castle Chonto (outside) |
 Castle Chonto (inside) |
 Castle Hakuro / Floating Castle (outside) |
 Castle Hakuro / Floating Castle (inside) |
 Child and Mu Calf | |
 Comroon Strait |
 Comroon Strait (cave) |
 Douglass |
 Douglass (Castle) |
 Douglass (Castle B1) |
 Douglass (Path to Nerak) |
 Douglass (Thomas' Hideout) | |
 Dragon Lair |
 East Oubliette |
 Eirunep Tower | |
 Emerged Island (inside) |
 Emerged Island (outside) |
 Fiends' Cloister |
 Firn Ruins |
 Floating Castle (Wagnas) | |
 Fort Cyfreet (outside) |
 Fort Cyfreet (inside) |
 Frozen Sea | |
 Gelid Ruins (inside) |
 Gelid Ruins (outside) |
 Gemstone Mine | |
 Great Wall |
 Great Wall (cave) |
 Lake Wyringa |
 Lake Wyringa (Narwhal) |
 Landship |
 Landship (Bokhohn) |
 Den of Umbrage |
 Den of Umbrage (Last Battle 1) |
 Den of Umbrage (Last Battle 2) | |
 Loess Ruins (outside) |
 Loess Ruins (inside) |
 Ludon Highlands | |
 (Maze of Memory) Black Labyrinth (1) |
 (Maze of Memory) Black Labyrinth (2) |
 (Maze of Memory) Black Labyrinth (3) |
 (Maze of Memory) Black Labyrinth (4) |
 (Maze of Memory) Blue Labyrinth (1) |
 (Maze of Memory) Blue Labyrinth (2) |
 (Maze of Memory) Blue Labyrinth (3) |
 (Maze of Memory) Blue Labyrinth (4) |
 (Maze of Memory) Green Labyrinth (1) |
 (Maze of Memory) Green Labyrinth (2) |
 (Maze of Memory) Green Labyrinth (3) |
 (Maze of Memory) Green Labyrinth (4) |
 (Maze of Memory) Red Labyrinth (1) |
 (Maze of Memory) Red Labyrinth (2) |
 (Maze of Memory) Red Labyrinth (3) |
 (Maze of Memory) Red Labyrinth (4) |
 Maze of Memory (Labyrinth Boss Battle) |
 Maze of Memory (Dread Queen Battle) |
 Melu Desert | |
 Messina Mine (inside) |
 Messina Mine (outside) |
 Mt Chikapa |
 Mt Chikapa (cave) |
 Mt Comroon |
 Mt Comroon (Stone) |
 Nazelle Strait |
 Nazelle Strait (ship) |
 Nuono (grass) |
 Nuono (house, underground) |
 Nuono (ship) | |
 Salamat | |
 Savannah (night) |
 Savannah |
 Sealed Cave | |
 Seer's Citadel (inside) |
 Seer's Citadel (outside) |
 Snowdrifts | |
 Somon |
 Somon (Mansion) |
 South Oubliette |
 Steppe |
 Sunken Ship (outside) |
 Sunken Ship (inside) |
 Sunken Ship (Subier) | |
 Sunken Tower, Teretuva Tower |
 Teretuva Tower (night) |
 Teretuva (night) | |
 Termite Den |
 Toba (cliffs) |
 Trader Ship |
 Watchman Nest |
 Wandering Lake |
 Waterway Maze |
 Witch's Sanctum |
BACKGROUND MOTIFS & ELEMENTS
Here are a few of the simple motifs that, repeated, form Romancing Saga 2's numerous backgrounds of the Adventure Maps.
And here are a few elements / objects:
AND A FEW QUOTES..


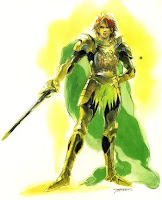
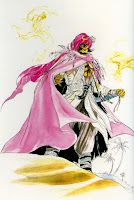
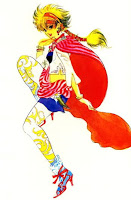
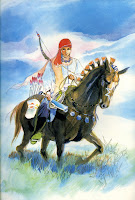
ORIGINAL ARTWORKS
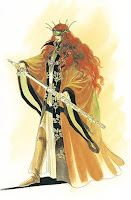
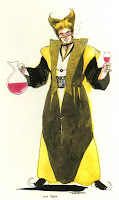
Character design for RS2 is the work of KOBAYASHI Tomomi.
Here are a few of her many paintings for RS2 or related, old and new:


ROM, OST, GOODIES, ETC.
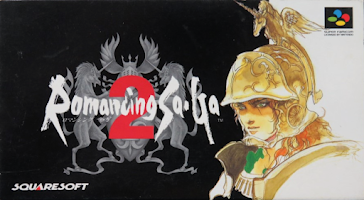
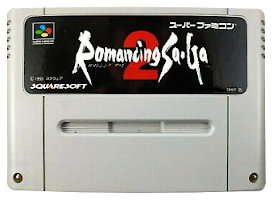
The original SFC box and rom, and the boxes of the Remaster physical release:


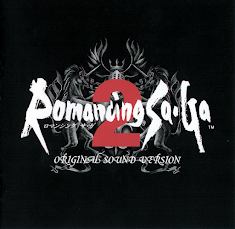
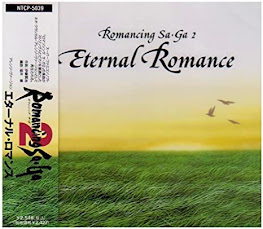
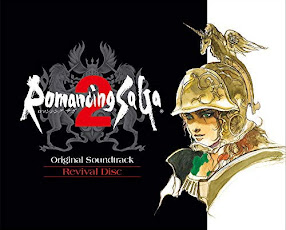
Various OST (1993/2006, 1994, 2016, 2020):

Various books and magazine specials:


Romancing SaGa 2 Kiso Chishiki-hen (Basic Knowledge). NTT, 1993 (Dec 1).
Romancing SaGa 2 Bouken Guidebook (Adventure Guidebook). NTT, 1993 (Dec 1).
Romancing SaGa 2 Kanzen Kouryaku-hen (Complete Strategy Guide). NTT, 1994 (Feb 1).
Romancing SaGa 2 Teiougaku Nyuumon / Introduction to the Study of Regal Principles. Dengeki Super Famicom, issue 21, Supplement 1.
Romancing SaGa 2 Scoop Guidebook (Complete Guidebook). Family Computer Magazine, Nov 12 issue (#23, 1993), Special Supplement 1.
Romancing SaGa 2 Kanzen Guidebook (Complete Guidebook). Family Computer Magazine, Dec 10 issue (#25, 1993), Special Supplement 1.
Romancing SaGa 2 Kouryaku Guidebook (Strategy Guidebook) 1, 2, 3. Supplements to: Family Computer Magazine, 1993/12/24, 1994/1/7, 1994/2/18.
Romancing SaGa 2 Kanzen Data Guidebook (Complete Data Guidebook). The Super Famicom, 1994/1+21.
Romancing SaGa 2 Kouikeishou (Imperial Succession). Haou Magazine, 1994/2, Supplement.
Romancing SaGa 2 Kouryaku Data & Manga Theater. Haou Magazine, 1994/3, Supplement.
etc.!


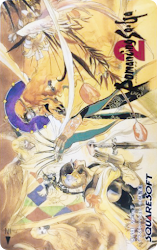
Various phonecards:


REFERENCES
INFO
https://wikiwiki.jp/romasaga2/%E3%83%AA%E3%83%A1%E3%82%A4%E3%82%AF/%E6%96%B0%E8%A6%81%E7%B4%A0
https://wikiwiki.jp/romasaga2/%E3%83%AA%E3%83%A1%E3%82%A4%E3%82%AF/%E4%BF%AE%E6%AD%A3%E8%A6%81%E7%B4%A0
https://wikiwiki.jp/romasaga2/%E3%83%AA%E3%83%A1%E3%82%A4%E3%82%AF/%E9%9D%9E%E5%A4%89%E6%9B%B4%E7%82%B9
GAMEPLAY
http://kaerulabo.web.fc2.com/rs2/system/initial_hp.html
http://kaerulabo.web.fc2.com/rs2/data/next_lvup.html
http://s-endo.skr.jp/rs2chrlvup.txt
https://gcgx.games/rs2/revenue.html
https://hako.g-7.ne.jp/rs2/univ/8-15.html
https://wikiwiki.jp/romasaga2/%E5%B9%B4%E4%BB%A3%E3%82%B8%E3%83%A3%E3%83%B3%E3%83%97
https://gcgx.games/rs2/jump.html
http://s-endo.skr.jp/rs2formdata.txt
http://kaerulabo.web.fc2.com/rs2/data/form_data.html
http://kaerulabo.web.fc2.com/rs2/Android/form_data.html
https://gcgx.games/rs2/formation.html
https://gcgx.games/rs2/re/formation.html
https://tvgame.fun/romancing-saga2/battle/back-attack.html
http://hako.g-7.ne.jp/rs2c/research/wforum.cgi?no=144&reno=no&oya=144&mode=msgview&list=
https://web.archive.org/web/20160410021246/http://homepage1.nifty.com/rs2/univ/pattern.html
https://wikiwiki.jp/romasaga2/%E5%AE%9F%E7%94%A8%E3%83%86%E3%82%AF%E3%83%8B%E3%83%83%E3%82%AF#xe424326
https://penpenpenta.web.fc2.com/romancing_saga_2/etc_6.html
CHARACTERS
http://s-endo.skr.jp/rs2chrparam.txt
http://s-endo.skr.jp/rs2chrflag.txt
http://s-endo.skr.jp/rs2chrspparam.txt
http://s-endo.skr.jp/rs2chrspflag.txt
http://kaerulabo.web.fc2.com/rs2/data/chara_data_normal.html
http://kaerulabo.web.fc2.com/rs2/data/initial_tec_equ.html
http://kaerulabo.web.fc2.com/rs2/data/chara_data_special.html
https://gcgx.games/rs2/re/class.html
http://youhua.vis.ne.jp/jiten/ava_a.html
http://tameblog.blog5.fc2.com/?m&no=590
http://ultimagarden.net/report/zser_rs2_nosave/contents/emperor.html
https://web.archive.org/web/20070208125307/http://www.geocities.jp/gedo_k/rs2/defaultjutsu.html
TECHS / SPARKING
http://kaerulabo.web.fc2.com/rs2/data/tec_data_all.html#id53
http://kaerulabo.web.fc2.com/rs2/data/tec_data_physical_attack.html
http://kaerulabo.web.fc2.com/rs2/data/tec_data_status_abnormality.html
https://gcgx.games/rs2/technique.html
http://s-endo.skr.jp/rs2techevadedata.txt
http://kaerulabo.web.fc2.com/rs2/data/tec_flashing_type.html
http://kaerulabo.web.fc2.com/rs2/data/monster_data.html
https://gcgx.games/rs2/mikiri.html
http://kaerulabo.web.fc2.com/rs2/system/damage_expression.html
https://w.atwiki.jp/sansara_naga2_sfc/pages/17.html
http://kaerulabo.web.fc2.com/rs2/system/system_atk_hit.html
http://kaerulabo.web.fc2.com/rs2/data/tec_flashing_type.html
MAGIC
http://kaerulabo.web.fc2.com/rs2/data/tec_data_all.html
http://kaerulabo.web.fc2.com/rs2/data/tec_data_magic.html
http://kaerulabo.web.fc2.com/rs2/data/tec_data_status_abnormality.html#memo1_bottom
https://gcgx.games/rs2/magic.html
https://tvgame.fun/romancing-saga2/spell/umbrology.html
https://w.atwiki.jp/aniwotawiki/pages/14729.html
https://wikiwiki.jp/romasaga2/%E5%AE%9F%E7%94%A8%E3%83%86%E3%82%AF%E3%83%8B%E3%83%83%E3%82%AF#kongoutate
http://kaerulabo.web.fc2.com/rs2/system/system_chisou.html
http://kaerulabo.web.fc2.com/rs2/system/damage_expression.html
ITEMS
http://s-endo.skr.jp/rs2itemparam.txt
http://s-endo.skr.jp/rs2itemeffect.txt
http://s-endo.skr.jp/rs2itemregist.txt
http://kaerulabo.web.fc2.com/rs2/data/item_data_normal.html
https://gcgx.games/rs2/item.html
https://gcgx.games/rs2/re/weapon.html
https://gcgx.games/rs2/re/protector.html
https://gcgx.games/rs2/re/shield.html
http://wikiwiki.jp/romasaga2/%E3%82%A2%E3%82%A4%E3%83%86%E3%83%A0
https://web.archive.org/web/20161001154936/http://homepage1.nifty.com/rs2/univ/library/itemplus.html
MONSTERS / BOSSES
http://s-endo.skr.jp/rs_analyzer.html#Technical_Data-RS2
http://s-endo.skr.jp/rs2monparam.txt
http://s-endo.skr.jp/rs2monregist.txt
http://s-endo.skr.jp/rs2monflag.txt
http://s-endo.skr.jp/rs2monequip.txt
http://s-endo.skr.jp/rs2monitem.txt
http://kaerulabo.web.fc2.com/rs2/data/monster_data.html
http://infoseek_rip.g.ribbon.to/hkaityo.hp.infoseek.co.jp/dq/
https://web.archive.org/web/20160404192339/http://www.geocities.jp/gedo_k/rs2/firstaction.html
http://kaerulabo.web.fc2.com/rs2/data/monster_form.html
https://web.archive.org/web/20160404192334/http://www.geocities.jp/gedo_k/rs2/enemy.html
https://gcgx.games/rs2/e_seven_heroes.html
http://kaerulabo.web.fc2.com/rs2/etc/Rare_monsters.html
https://wikiwiki.jp/romasaga2/%E3%83%A2%E3%83%B3%E3%82%B9%E3%82%BF%E3%83%BC/%E3%83%9C%E3%82%B9/%E4%B8%83%E8%8B%B1%E9%9B%84
http://kaerulabo.web.fc2.com/rs2/data/monster_event_battle.html
WALKTHROUGH
http://hako.g-7.ne.jp/rs2/univ/library/ca_ever.html
https://gcgx.games/rs2/ending.html
http://hako.g-7.ne.jp/rs2/univ/nazelle.htm
https://gcgx.games/rs2/dungeon.html
http://kaerulabo.web.fc2.com/rs2/etc/world_map.html
http://hako.g-7.ne.jp/rs2/univ/keikap.html
TRIVIA / VARIA
https://penpenpenta.web.fc2.com/romancing_saga_2/etc.html
http://romasaga2tebiki.seesaa.net/article/185370040.html
http://romasaga2tebiki.seesaa.net/article/237483028.html
https://wikiwiki.jp/romasaga2/%E3%83%90%E3%82%B0%E3%80%81%E6%80%AA%E7%8F%BE%E8%B1%A1%E3%80%81%E5%B0%8F%E6%8A%80%E5%A0%B1%E5%91%8A
https://wikiwiki.jp/romasaga2/%E5%AE%9F%E7%94%A8%E3%83%86%E3%82%AF%E3%83%8B%E3%83%83%E3%82%AF
https://gcgx.games/rs2/tips.html
https://gcgx.games/rs2/re/tips.html
https://gcgx.games/rs2/coppelia.html
http://kaerulabo.web.fc2.com/rs2/bug/bug_chara.html
http://kaerulabo.web.fc2.com/rs2/bug/bug_chara_conditions.html
http://kaerulabo.web.fc2.com/rs2/bug/bug_chara_data_index.html
http://kaerulabo.web.fc2.com/rs2/data/item_data_bug.html
https://geolog.mydns.jp/www.geocities.jp/realdame_bucho/mapchange.html
https://geolog.mydns.jp/www.geocities.jp/realdame_bucho/rs2dame.html
https://geolog.mydns.jp/www.geocities.jp/realdame_bucho/yousai.html
https://gamefaqs.gamespot.com/snes/588633-romancing-saga-2/faqs/31378
http://hako.g-7.ne.jp/rs2/univ/p_normal/bag_e.html
http://hako.g-7.ne.jp/rs2/univ/p_normal/bag_mapc.html
http://hako.g-7.ne.jp/rs2/univ/pankyo.html
http://hako.g-7.ne.jp/rs2/univ/library.html
http://eternal-g.la.coocan.jp/romasaga2/top.htm
http://eternal-g.la.coocan.jp/romasaga2/bagu.htm
http://eternal-g.la.coocan.jp/romasaga2/leon.htm
https://gcgx.games/rs2/botu.html
https://geolog.mydns.jp/www.geocities.jp/realdame_bucho/tosyo.html
https://www.famitsu.com/news/201503/09073560.html
https://www.spriters-resource.com/snes/saga2/
QUICK LINKS
No-Spoiler Tips - Game Info - Gameplay - Characters - Techs - Sparking - Magic - Items - Monsters - Bosses - Maps - Trivia & Secrets
Walkthrough: Part 1 - Part 2 - Part 3 - Part 4
COPYRIGHT / ATTRIBUTIONS
Except where noted otherwise, I am the author of all parts of this website (including all screenshots, all maps, walkthroughs, translations & adaptations). Evidently, no part of this website may be reproduced, distributed or published without my prior written consent: failing to comply is a violation of author's rights / copyright laws. With the obvious sole exception of a short quote: kindly attribute. Please respect other people's work, like you'd expect other people to respect your own. Thank you!
CONTACT
If you see a typo, an error or would like to make a suggestion, feel free to contact me: romancingsaga3fan@gmail.com
See also --> ROMANCING SAGA 3 BLOGSPOT
YOU ARE SPLENDID
This page was helpful? Feel free to show your support! It is possible via Paypal (here or directly to the e-mail address above). Thank you!