
Walkthrough 1
Walkthrough Pt. 1 - Introduction | North Varennes | South Varennes | Ludon | Nazelle | Frozen Sea
Walkthrough Pt. 2 - Cumberland | North Longit | South Longit
Walkthrough Pt. 3 - Steppe | Savannah | Melu | Austeros
Walkthrough Pt. 4 - Comroon | Salamat | Jauda | Torrence | Last Emperor
Walkthrough Pt. 2 - Cumberland | North Longit | South Longit
Walkthrough Pt. 3 - Steppe | Savannah | Melu | Austeros
Walkthrough Pt. 4 - Comroon | Salamat | Jauda | Torrence | Last Emperor
This first part of the Walkthrough deals with the Introductory Events and the various quests located in the regions of North and South Varennes, Ludon, Nazelle and the Frozen Sea.
The Introduction excepted, there is no compulsory order for quests and you are free to deal with the quests available to you in any order you want. Nevertheless, some areas are only accessible after completing specific quests, and some quests are only accessible after a certain number of generations have passed. This walkthrough is thus mostly geographic and at times you will have to jump from one section to another: do not let this bother you! Maps of all dungeons are included below; town maps are in the Maps section. If you feel lost or do not know what to do, this Complete Quest List can also serve as a rough check list or reminder.
The Introduction excepted, there is no compulsory order for quests and you are free to deal with the quests available to you in any order you want. Nevertheless, some areas are only accessible after completing specific quests, and some quests are only accessible after a certain number of generations have passed. This walkthrough is thus mostly geographic and at times you will have to jump from one section to another: do not let this bother you! Maps of all dungeons are included below; town maps are in the Maps section. If you feel lost or do not know what to do, this Complete Quest List can also serve as a rough check list or reminder.
INTRODUCTION


The opening cutscene introduces us to the world of Romancing Saga 2..
The legend of the Seven Heroes, who saved the world then vanished, rumored to reappear one day..
A glimpse of area maps all around the world..
Monsters attacking towns, humans unable to defend themselves..
And the return of the Seven Heroes..
But! ..

At game start, you choose the gender and the name of a character,
and the Bard tells us the tale of Avalon..


It starts with King Leon and his two sons Victor and Gerard.
Leon takes Gerard monster-hunting in a cave..
SEALED CAVE

Enemies: Insect, Inorganic, Beast, Reptile, Beastman.
Loot: Kris Knife, 100kG.
This short introductory dungeon is perfect to get used to the commands.
Have a look at the 'Select' Menu, from which you can manage your party.
In the Remaster Setting screen, notice that you can either set Walk or Dash by default. Running into enemies will break your formation every time, so be careful what you choose.
Here you will also have your first battles (in detail in the Gameplay section).

A few enemies (the Tuatara may one-shot some of your characters, and that's perfectly normal: that will happen A LOT during the game...) and two chests, one with money, one with an accessory, a Kris Knife.
Now go back to the start, get out of the cave and to the Regional Map.
Notes:
- It is possible to exit the cave as soon as the game starts, but you would be missing on its treasures.
- SFC: If you go out of the cave as soon as the game starts, sometimes you are stuck! unable to enter the cave again (sealed), unable to move forward to Avalon... If you battle at least once inside the cave you can move on safely.
NORTH VARENNES (Year 1000)
AVALON
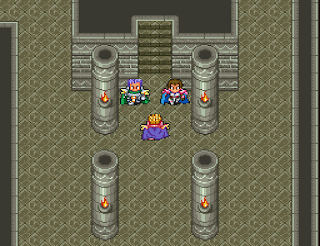
From the Regional Map you can access Avalon, the capital of the Empire and your base of operations.

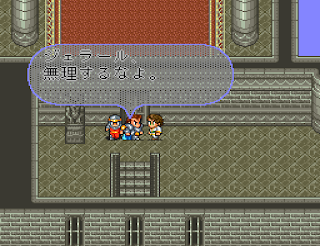
Follows a cutscene (you meet brave big brother Victor, and a seer named Orieve comes to talk with Emperor Leon) after which you gain control of Gerard.
You can now have a look around and at this point can actually explore most of Avalon (in fact the most complex place in RS2!), with her town, castle and sewers, even though there is in fact not much to do.
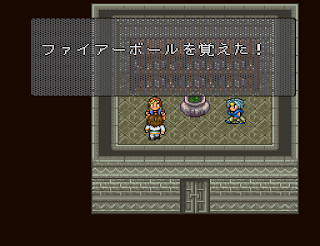
Still, on the ground floor of the Castle, talk to Emerald (the orange female mage in the right-most room) to learn the spell Fireball.
SFC: Note that if you fought fewer than 10 battles in the Sealed Cave, your Battle Counter is set to 10.
Remaster: You can check how many battles you have fought so far by talking to the adequate NPC (2F, bottom right, Remaster only) and already see the revenue and funds of the Empire (2F also, the two NPC in the small room left of the throne).

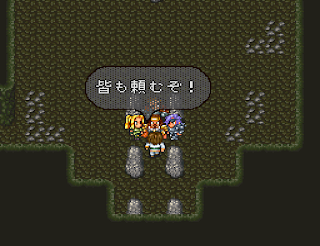
Leave the Castle, stroll in town if you wish and go back to the Castle: a short monologue occurs: go talk to Emperor Leon where you left him (in the Throne Room, Castle 2F): you learn that the seer had come to warn about Kzinssie of Somon, one of the Seven Heroes.
But for now, Leon needs to deal with the Watchmen and brings Gerard with him.
Exit the town and off to the Watchmen's Den.


WATCHMAN NEST

Enemies: Plant, Insect, Reptile, Zombie, Skeleton, Inorganic, Reptile, Beastman.
Loot: Bastard Sword.
Quite straightforward. Avoid the Slime enemies if you have no MP left. At the fork, left for treasure (which you can grab after defeating the boss), right for the boss (the static Beastman enemy).
You must defeat Watchman x2 and Beastman x3: be quick or be dead!
Head out and back to Avalon (revenue +400G).
AVALON AGAIN
While you were away, Kzinssie attacked Avalon and easily killed Victor..
Leon and Orieve talk while Gerard is in shock.


And off we go to Somon to get our revenge.
SOMON
The town of Somon is overrun by monsters (Beastman, Flying, Beast, Human).
Enter the mansion at the top, the only dwelling accessible at this time.


KZINSSIE'S MANSION
Enemies: Skeleton, Human, Beast, Beastman, Demon, Zombie, Ghost, (Doppelganger).
Loot: Somon Ring, Lion Helm, 470kG.

In Kzinssie's Mansion, lots of enemies too.
Take the treasures (including those in the secret room accessible from 1F fireplace)
but be careful of the chests with a Doppelganger (the RPG-famous Mimic enemy).


Doppelganger (999 HP) is quite strong.
To defeat them, Defend/Parry with Bear, keep him healed, and hit with the others (use physical attacks).
If for some reason you want to fight plenty of Mimics: kill them, save your game, reset and reload: they are respawned (SFC only).
On the third floor, Kzinssie is waiting for you.


Equip some Balms to recover from Ill Storm's Poison, just in case.
666+ dmg later, Kzinssie Soulsteals Leon, who falls..


Back in Avalon, Leon passes his rule and his power to Gerard thanks to the Inheritance Magic learnt from Orieve the Seer and you gain the Soulsteal Ward. (Do not erase it from your tech list unless you want to have to grind unreasonably to survive your next encounter with Kzinssie.)
In the meanwhile Goblins are attacking Avalon! It never ends!
Leon's items are now in the storeroom/warehouse (2F, top right) and you have one spot to fill in your party: a healer (male mage, 1F lower right) could come up handy but it is up to you.


When you are ready, head out and defeat all 8 Beastman enemy groups (Goblins) in town.
Once that is done, the Mercenaries repent and join you. All good.
Now you can either pursue the Goblins or head straight to Somon.
You will be able to do both, so up to you. (You can even keep the Goblins for much later.)
We will head to the Goblin's Lair first (for a better bow + uncrippled income).
THE GOBLIN HIDEAWAY
Enemies: Beastman, Snake, Demon, Reptile, Inorganic, Zombie, Skeleton.
Loot: Elder Bow, 100kG.
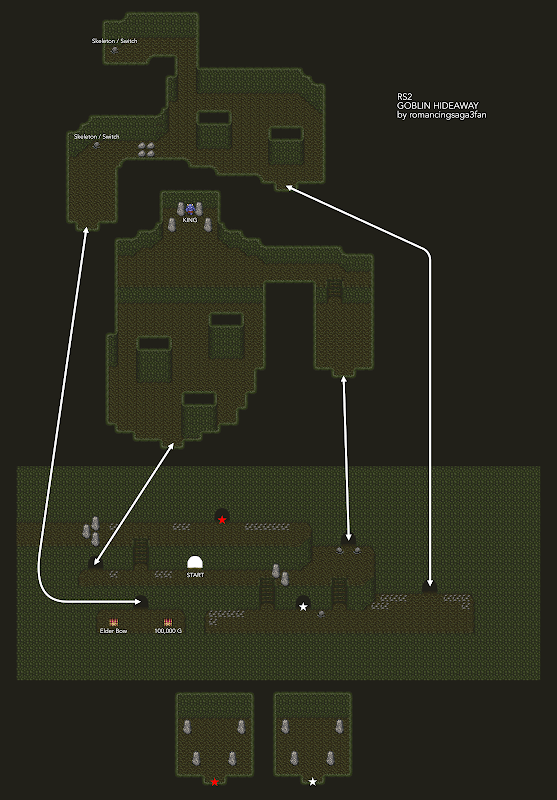
Monsters swarm the Goblin Hideway. To remedy this, go straight to the boss, right down right up.


King can be difficult, depending on RNG (Counter and Final Strike can decimate your party).
Blind him from the start, and if you have trouble dealing with him Stun him at every turn with a fast character (with Feint, Knee Split, Daze..).
Once King is gone, most monsters will be gone too. Come back to the main room, enter the right-most cave and follow the path: you will have to defeat a couple of Skeleton enemies (touch the skulls) to open the path on your way to the chests and back.
Congratulations, income +1400G!
KZINSSIE OF SOMON
Now get ready (equip some potions) and head to Somon to go face Kzinssie in his Mansion for the second time. Keep yourselves healed and cured and it shouldn't be too hard. Kzinssie has 999 + 1300 (+ 130 HP regen per turn) and when he is defeated he suggests that this is not the end.. You take control of North Varennes! Income +1000G!


Note: It is possible to defeat Kzinssie without the Soulsteal Evade skill: either be strong enough to defeat him before he can use Soulsteal, or let him run out of SP, which means you still need to be strong enough to survive until then. Both ways are tedious and unrewarding, so just restart the game if you have mistakenly erased the Soulsteal Evade from your list ; )
YEAR 1001


One year passes (or two or three!). Time to start the conquest of the whole continent! - I mean, time to start the adventure! A way to South Varennes has been opened.


Before that, sit on your throne:
- If Gerard has 25+ MP, you can build the Magic Research Facility for 1mG. It will allow you to learn magic spells and recruit specific mages. See the Magic section.
- Remaster Only: You can also build the Orchard (300kG), which will provide additional income. See the Orchard section for details.
If you ask your chancellor (at any time you can be reminded of the ongoing quests by talking to him in Avalon Castle 2F bottom right), there are 2 issues to solve in the South, and one local problem, concerning:
- a mine in Ludon
- a fortress over the Victor Canal
- thieves in Avalon
But from then on you can freely choose what you want to do!
Hence the following walkthrough will mostly be presented by Region, factored by accessibility convenience.
Some quests are pretty linear, while others have plenty of branching and possibilities.
Have fun!
***
NORTH VARENNES

In North Varennes there are two towns, Avalon (below) and Somon, and a few dungeons linked either to the Introduction or the Endgame.
For the Goblin Hideway, which can be completed after the Introduction, see this section.
For the endgame Sealed Cave, see the Last Emperor section.
AVALON
For the Introductory Events set in Avalon, see the Introduction.
For the Thieves in Avalon, see Route 1) of the Canal Fortress.
For the Final Events set in Avalon, see the Last Emperor section.
Avalon is by far the most complex place in RS2.
When Kzinssie is defeated in Somon, the Dojo appears (the 3 Instructors, Castle 1F top-right) near the Formation Officers. This is where your Weapon Skills are recorded (after a Time Skip or after you defeat a Hero). See the Skills section for details.
Avalon will evolve and grow as you order specific contructions to be completed.
Several actions will become available to you when you sit on the throne if the conditions are met.
These Throne Events take 15 battles started to complete.
Notes:
- If you refuse an action on the throne and change your mind, just seat repeatedly (6 times) on your throne for the event to come round again.
- SFC only: if you start R&D for weapon/armor after agreeing to a throne action, it will only take 5 battles. This is due to the existence of only one counter for both: see the Trivia section for details.
Orchard (Remaster only)


After the Introduction you can build the Orchard (300kG), which will provide additional income. It will take 15 battles (or 1 generation skip) to complete and will be found at the new S-W exit of Avalon town. You will be able to upgrade it twice, after a set number of battles (sit on the throne to upgrade). You must talk to the old man for intermediary levels (and corresponding income raises) to happen (the size of the tree or the number of trees increases): be sure to go there often to reap what you sowed. See the Orchard section for details!
Magic Research Facility


After the introductory events, if your Emperor has 25+ MP, you can build the Magic Research Facility for 1mG.
Take the new N-W town exit to reach the building.
It will allow you to learn magic spells and recruit specific mages, and adds 200G to your income.
See the Magic section for details!
Imperial University

When The Empire is composed of 5 regions (i.e. after you gain 4 additional regions), you can build the University for 2mG.
Access it from the new W town exit.
It adds 200G to your revenue and once you pass the entrance test you can recruit Strategists and unlock higher magic spells.
Talk to the librarian in the N-E corner of the University to take the entrance test.
You have to get 6/10 correct answers to pass. There is no penalty for failing: just retry.
Q1: 772 / Q2: Oreon style / Q3: Rocbouquet / Q4: Terralogy / Q5: Soulsteal / Q6: 10,000 / Q7: Divide / Q8: Watchman (note that "Lynx" is translated incoherently: it is "Linx" in the Remaster version..) / Q9: Bokhohn / Q10: (the place of the correct answer depends on your Generational Battle Count; just check your revenue before taking the test, but full marks don't do anything anyway).
Imperial Guard

When the Empire gathers 9 regions in all, for 300kG you can form the Imperial Guard, whom you will be able to recruit.
They are waiting for your orders at the foot of the first staircase by the entrance of Avalon Castle.
Avalon New Town District


Once Comroon, Nazelle and Jauda are part of the Empire, you can expand the town for 3mG.
Located south of the Cemetery, it adds 1000G to your income and all recruitable characters (except Holy Order and Brawler) are now very conveniently found there too.
SOMON
In Somon you can board a ship to Douglass (Cumberland) or Miles (Steppe).
There lives Hiraga the genius inventor, generations of him in fact (the game starts with Hiraga the 3rd), who will be able to make various things for you, linked with severals events and quests.
The Windmaker


Talk to Hiraga 11+ with a Strong Emperor (Light Infantry, Mercenary, Imperial Guard, Levante Guard, Desert Guard, Male Nomad, Male Holy Order, Armed Merchant, Saigo, Brawler, Salamander, Coppelia, Last Emperor) and try the invention to get the Windmaker, which can be of use in Jauda.
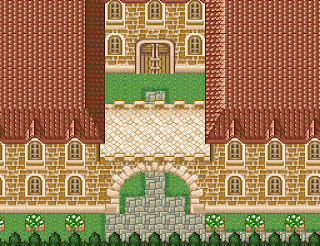
Leon Bridge in Miramar
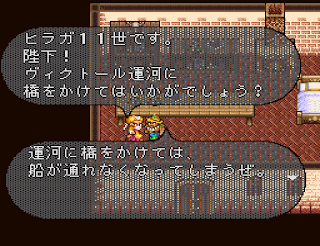
At the 6th generation after the destruction of the Canal Fortress, go see Hiraga with 1M G in your treasury: you can build a bridge over Viktor Canal. If you accept, you can go straight to Miramar to behold the Leon Bridge! Talk to Hiraga there to complete this event (year +1, revenue +600 G).
Note that you can sightsee it from the Armed Merchant ship in Mobelm! (talk to the sailor at the helm of the Armed Merchant ship).
Coppelia

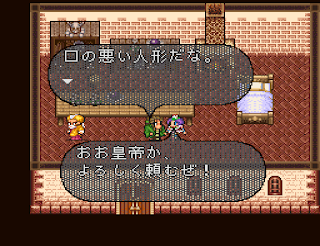
Talk to Hiraga 18+ (before the start or after the completion of the Leon Bridge Destruction Quest) to learn of his inventing the first automaton, Coppelia, who has a great sense of humor already.
You can recruit her but cannot control her. If your Emperor LP-dies, she won't be available for inheritance.
In the next generation of your recruiting Coppelia, she appears as an Emperor canditate this one time only (unless Last Emperor). Her manners change radically as she gains a proper consciousness (what a shame). Empress Coppelia can be controlled normally in battle.
Note that if Empress Coppelia LP-dies or party gets wiped out, after the next time jump there is a broken Coppelia in the Warehouse: inspect her to play an arrangement of 'Namida wo Fuite' ('Wipe your Tears Away'), a song by Uematsu Nobuou from Makai Toushi SaGa (Final Fantasy Legend).
Note (Remaster): If you refused to build the Leon Bridge, let a generation skip occur which triggered Coppelia, and have less than 1MG (= cannot build the bridge), then you cannot recruit Coppelia. You must earn enough money to build the bridge first.
***
SOUTH VARENNES

There are two main quests in South Varennes: the Canal Fortress and the Fiends' Cloister.
At some point you can have Hiraga from Somon build the Leon Bridge in Miramar,
and at some point the bridge gets destroyed and you can probably do something about it.
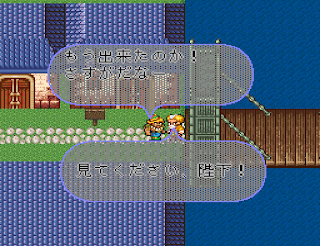
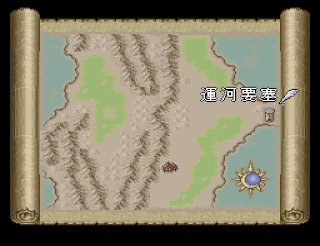
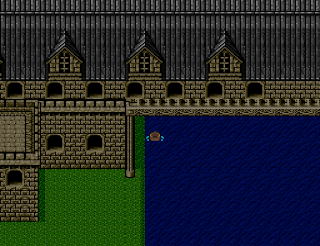
THE CANAL FORTRESS
A fortress blocks the Victor Canal. How no one noticed it before it was completed is a wonder!
You have to investigate this matter.

There are three ways to deal with this: with a thief (1), with money (2), with brute force (3).
1) A thief with a debt makes a good spy.
One way to do this, and probably the best way, is connected to your 'local problem'.
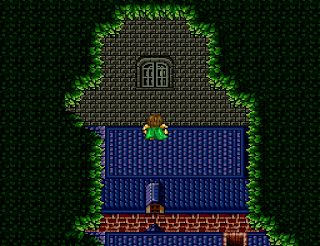
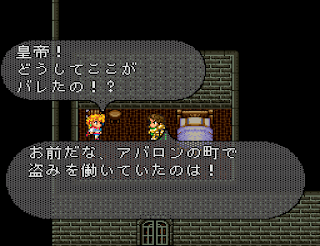
AVALON ROOFTOPS AT NIGHT
Enemies: None.
Loot: 100kG (++ on SFC).
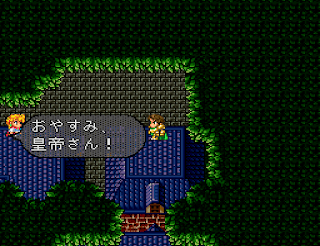
Sleep in your bed (Avalon Castle, 2F): you can move at night.
Go to the N-W shop and enter the fireplace (this is heavily hinted at in the Remaster edition): you can move about the rooftops!
Follow the path (dash to jump from ledge to ledge) to a window into your own castle where Cat the thief is surprised and runs away (grab 100 kG while you are there).


Follow her and help her (if you won't, you will still be able to access the Thieves' Guild but you won't be able to recruit Vagabonds and you will have to find another way into the fortress: skip to the next section) to put her in your debt, and sleep away the rest of the night.


At the Pub, ask how Cat is doing, which will redirect you to the cemetery in the N-E part of town: talk to the caretaker and meet the Thieves' Guild.
Talk to the leader, who would help you in exchange for cleaning up the sewers leading to an underground burial ground.
Exit the room by talking to the man at the bottom-left and enter the sewers.
AVALON SEWERS
Enemies: Fish.
Loot: None.
You will notice several passages connect the sewers to the surface (if you hadn't explored the depths of Avalon yet).
Anyway. Get your feet wet and go right (under, through an invisible pipe) to come upon a Deep One (Aquatic 12) which should not be too troublesome: keep yourselves healed and attempt to Paralyse it.

Defeat it and go back to the leader: Cat volunteers to help and leaves for the Canal Fortress in South Varennes.
Join her there in the Pub, follow her in the house below: there is a secret passage into the Fortress.


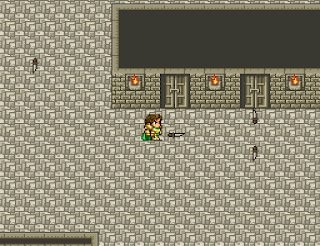
CANAL FORTRESS
Enemies: Demon, Beastman, Beast, Skeleton, Human,
Loot: Exorciser, Starstone, 380kG.

Cat really did a good job: knives show the way and the location of all chests.
If you enter any other room, enemies will rush to you and sound the alarm.


At the end of the path marked for you is a Vicar (Human 6), accompanied by a Pyrorex and a Lizard (Reptile respectively 9 & 5). He is a minion of Bokhohn, one of the Seven Heroes.
Possibly prefer the Free for All formation (Fissure Strike is a horizontal attack), Blind everyone (you can also try to Paralyze them, or even Confuse them with Id Break: at LV3 Confusion they can even hit themselves : ) and possibly impede or kill the reptiles first (they hit hard; Heat Wind means Game Over).
Congratulations! Your income increases by 400G, you can recruit Vagabonds, the town of Miramar is founded, and you can now access North Longit.
Notes:
- Normally, you cannot recruit Vagabonds if you do not clear the Fortress in the same generation you asked for Cat's help. But it is in fact possible to extend Cat's help to the next generations: have her open the secret passage (proceed until the dialogue: 'Be safe') and try to push through the Gate (win or retreat) before the generation skip.
- If you clear the Fortress before talking to Cat in the Pub, she will get angry and you will not be able to recruit Vagabonds.
2) Money solves (nearly) everything.
If you won't or cannot use a thief, go to the pub next to the Fortress and talk to the man sitting on the right: he will find a way in exchange of 20kG (in a strong Kansai dialect).
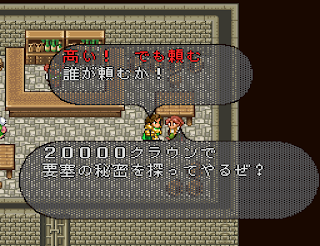

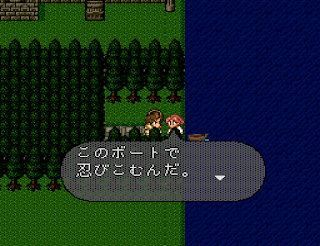
If you accept you have to pay the first half now; he leaves; leave too and come back to the Pub, talk to your man: he has found a way in: follow him into the woods at night (if you leave town now you will have to pay the first instalment again), talk to him to pay your 2nd instalment and use the boat to slip into the Fortress.
Notes:
- SFC only: Even if you have no pocket money, the story will proceed (and none will be taken from your treasury).
- Reminder for Remaster: you can fill your pockets by talking to your treasurer in Avalon (Castle 2F, left).


Only the boat sinks as soon as you get to destination: bad luck? (I say: Thank god it lasted until there!) And the alarm goes off as you pass the first door.. Additional guards at every floor.. Kill those in your path, then spare yourself some pain and follow the map the thief would have left you (see the previous section). There are only 2 rooms with treasure: all other rooms have enemies inside. The boss is on the 3rd floor (see the previous section).
Note: Careful! If at any point you leave the Fortress through the secret passage leading to town and exit the house, you won't be able to get back in and the only option left to you will be to force your way in through the Gate (see the next section). Same remark if you leave through the Gate.
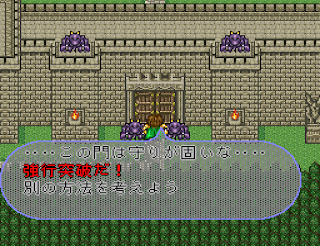
3) Brute force is a last resort?
At the Gate of the Canal Fortress, you can decide to enter by force.
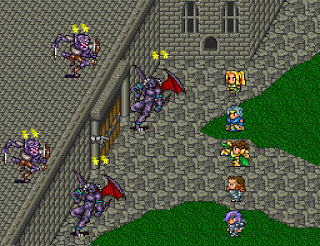
At this (early) point this is a (very) difficult battle: the Gate has 3000 HP and is guarded by an unlimited garrison of Gargoyles and Dobbys... Your best bet is to keep as many enemies as possible Paralyzed at all times, and chip away the Gate with ranged attacks (Fireball and Ki Blast mainly, because unfortunately the rest deals almost no damage).
The reward is *really* nice: 1000++ TP. And you can now proceed inside the Canal Fortress, full of enemies, though.
Do not decide to take a break and exit the town to sleep now: you would have to redo this battle. But if you wanted to level up hard in the fewest battles possible, this is another story and you can earn over 10k TP per battle by killing the refills ; ) The Gate respawns easily (see the Note just below).
Inside the Fortress, find your way to the boss, or have a look at the map and/or section 1) of the Fortress Canal walkthrough.
Epilogue: Note about the Canal Fortress
In fact, the Canal Fortress can be in several different 'states', triggered by specific actions.
0) Initial State: the 20kG Man is in the Pub; the Gate is guarded and options pop-up if you touch it; there is no enemy inside the Fortress except the Boss. This is also the state you return to if you escape the Fortress from inside the courtyard through the guarded Gate.
1) Gate-Crashing State happens when you try to force your way in through the front Gate: the 20kG Man is not in the Pub; the Thieves won't cooperate (but it is possible to extend their help to next generations in this state, see State 3C below); touching the Gate will automatically result in a battle; there are enemies in the Fortress Courtyard, and many enemies inside the Fortress.
If you defeat the Gate, it can be respawned by going out of the map and entering a building, or by exiting to the Regional Map twice (from any other Location the 2nd time), or by talking to Cat in the warehouse (3C: 'Be safe'). But even if the Gate is reset, state 1 may persist.
This Gate-Crashing State (1) can be troublesome. There are several ways to cancel or change it, partly depending on when it happens:
- In general, to revert to the Initial State (0), you must defeat the Gate, respawn it (leave to the Regional Map, come back, enter and exit the Fortress from the courtyard door) and escape the Fortress through the front Gate.
- If you challenge the Gate at night while following the 20k Man, just leave to the Regional Map to revert to the Initial State (0); but if you go in and out a building it is day again and state 1 persists (leave to the Regional Map to revert to 0); if you talk to the 20k Man a second time at night and infiltrate the Fortress, it changes back to state 2 (20kG Infiltration), and at this point if you challenge the Gate again (changes from state 2 to 1), you can change it back to 2 by talking to the man by the river (infiltration by boat follows), or back to 0 by leaving to the Regional Map.
- If you challenge the Gate before the Thieves' request to dispatch Deep One, the Thieves will not cooperate, even if you save Cat after attempting to break through the Gate. The only way to rectify this is to use the first method above (defeat the Gate, leave the Fortress through a respawned Gate).
- If you challenge the Gate between the Thieves' request to dispatch Deep One and Cat's relocation to the Canal Fortress, just talk to the Thief leader to rectify the situation to 3A.
- If you challenge the Gate while Cat is still in the Pub (3A) then talk to her, she will leave you definitively and the Thieves' help cannot be secured anymore.
- If you challenge the Gate while Cat is in the warehouse but you have not talked to her yet, this is a special Gate-Crashing state (State 3B2) in which you have access to the underground passage. This state can be changed to 3C by leaving through the front Gate from the courtyard.
- If you challenge the Gate after talking to Cat in the warehouse (3C: 'Be safe'), it does not change anything concretely (path still marked, few enemies..) but reverts to state 3C if you talk to Cat again.
2) 20kG Infiltration State happens after you pay 10k to the man in the Pub, leave and talk to him again (he says he has found a way in and asks you to follow him). This state has two parts:
2A) At night, outside: similar to State 0 except the 20kG Man is outside waiting for you. After you talk to the 20k Man once by the woods and a 2nd time by the river (Remaster: and have enough money) you board the boat and reach the pier inside the Fortress, still in that simili-State 0.
2B) Once inside, after you pass the door at the pier: Beastman enemies ambush you.
2C) These enemies' placement changes if you change rooms through any door; there are many enemies on the 2-3F (Demon, Skeleton, Human, Beast) but none in the courtyard. This State reverts to the Initial State 0 if you escape through the front Gate, or if you use the underground passage and leave to the Regional Map (note that once you leave the warehouse the underground passage secret entrance vanishes).
3) Cat Infiltration State happens after Cat volunteers to help you in the Thieves' Guild. The 20kG Man disappears from the Pub. This States has several parts:
3A) Cat is in the Pub (instead of the 20kG Man); the Gate is guarded and options pop-up if you touch it.
Careful: If you attempt to break through the Gate at this point, if you talk to Cat she will be angry and you won't be able to recruit Vagabonds. The only way to change this perilous situation is not to talk to her, and to trigger the interesting Catman State (when both Cat and the 20kG Man are in the Pub): defeat the Gate, leave to the Regional Map, go in and out the Fortress from the front door, exit through the respawned front Gate, talk to Cat in the Pub.
3B1) After you talked to Cat and she has moved to the warehouse: the secret passage is not open yet.
3B2) If you attempt to break through the Gate at this point: when you talk to Cat in the warehouse, her lines change (just 'It's here') and the Fortress is now in a special Gate-Crashing State: many enemies inside, but you have permanent access to the underground passage. Exit from the inside through the front Gate to change to state 3C.
3C) After you talk to her in the warehouse ('Be safe'): the underground passage is definitely open; the Gate is guarded and options pop-up if you touch it; inside the Fortress, the path is marked and there are only a few enemies away from the marked path. Attempting to break through the Gate will trigger a special Gate-Crashing state but will not change the number of enemies inside the Fortress anymore (only visible effect: immediate battle if you touch the Gate), but Cat's help will be extended even if a Time Skip occurs on another quest. If you defeat the Gate, it respawns if you talk to Cat (and a reset to 3C occurs).
NIBEL - DRAGON LAIR - FIENDS' CLOISTER
Beside the Canal Fortress, Nibel is the other place you can visit after the conquest of North Varennes. It is linked to your quest concerning the mine in Ludon in the South, to which you do not have access yet.
In Nibel, any NPC mentioning the Dragon Lair triggers its appearance on the Regional Map.
If you ask the bartender for a drink, you overhear bits of a conversation between two customers mentioning the Empire: if you go talk to them and say that you are the Emperor, you will be asked to clear the Fiends' Cloister (which opens it on the Map).
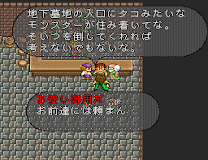
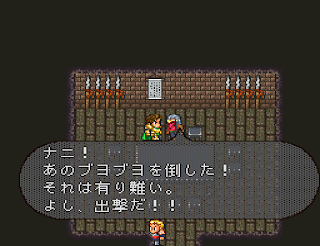
Alternatively, you can open the Fiends' Cloister by talking to the leader of the Dragon Lair, 'The Dragon' Karl, and agreeing to help him. He asks you to defeat the slimes (against which their Martial Arts are ineffective) but to leave the boss to them.
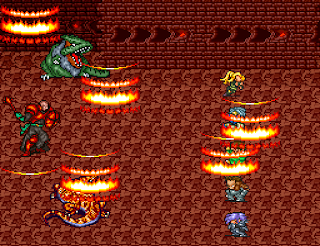
FIENDS' CLOISTER

Enemies: Spirit, Plant, Zombie, Insect, Skeleton, Reptile, Demon, Slime, Ghost.
Loot: Ring of Nibel, 90kG.

The Fiends' Cloister is a short and straightforward dungeon. Make your way to the static slime, a Gel Matter (use a vertical formation), kill it.
Presently you can either:
- do as Karl asked of you: go back to the Dragon Lair and talk to him: he goes out to clear the Fiends' Cloister and can now be found by the Boss (note that he will be waiting for you there indefinitely! you can even Time-Jump). Talk to him: you will now be able to recruit Brawlers at Dragon Lair (and income +600G).
- or keep going and clear the cave (the boss is the static Demon at the end). Now if you talk to Karl in the Dragon Lair, he will attack you.


If you defeat 'Master Dragon' Karl in single combat, the Dragon Lair empties, South Varennes falls under your control (income +800G). You cannot recruit Brawlers but a Brawler may randomly appear during a generation skip: if you select him as your Emperor, the Dragon Lair revives and you can recruit Brawlers from then on.
If you retreat from or lose the duel, income +800 but you will never be able to recruit Brawlers.
If a generation skip happens without the duel occurring, no income and no recruiting. Boo.
One last thing: go to Nibel and talk to the old man on the right in the Pub: the way South into Ludon and the town Tefal is now open. To the mines!
MIRAMAR: THE DESTRUCTION OF LEON BRIDGE
15 battles after you have built the Leon Bridge, talked to Hiraga in Miramar and the bridge is named, when you visit Miramar again, you find that the bridge has been destroyed!
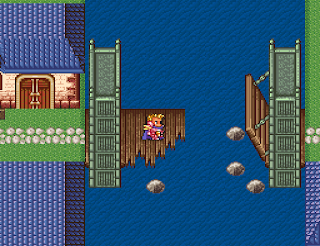

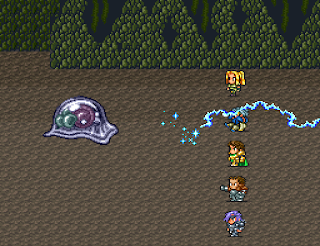
The responsible party, The Lord of the Seas, officially translated as 'Narwhal', is located in the N-W cave of Lake Wyringa (Steppe / Melu Regions).
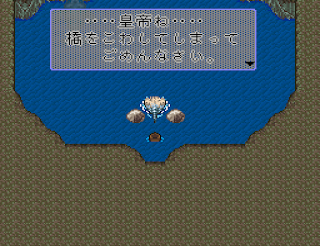
- If you have the Seabreeze Shell, which you can buy for 1000G from the elder in Saigo Village (Nazelle Region), you understand its language and the situation, let it be water under the bridge, and the bridge be restored too ; )
Note that if you have reconciled but changed your mind and want to battle instead, before leaving the cave, throw away the Seabreeze Shell and talk to Narwhal again.

- If you don't have the Shell in your inventory, you can either battle or ignore it.
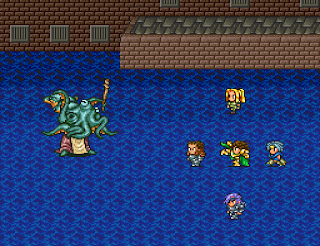
Narwhal (about 24500 HP) is a very strong Spear user (use a vertical formation) and its Thunder Volt can be deadly: a high Bolt Def (Rubber Soles) and Evades techs for Skewer, Sharp Thrust or Petrify Rush are most welcomed.
Note that if you defeat it, Subier levels up.
***
LUDON
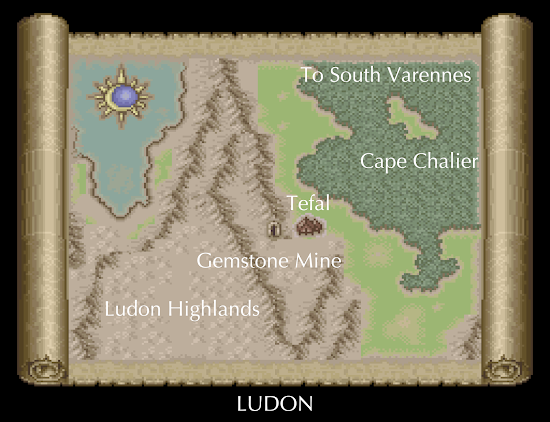
In the Ludon region at last.
In Tefal, any of three people will open the Gemstone Mine on the Map.
You learn that there are monsters in the mine. Let's head there.
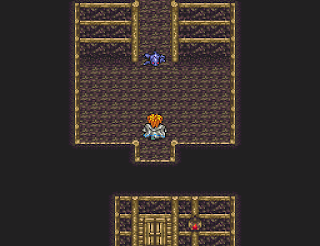
GEMSTONE MINE (1)

Enemies: Snake, Undead, Inorganic, Insect, Skeleton, Amphibian.
Loot: 850kG.
Inside, some money, some traps (1F N-E and S-W), and at the end a (stronger) static amphibian/reptile enemy.
Defeat them to gain control of the Ludon region (income +2800G).
Don't forget to come back to the mine to grab the three crystals behind the boss for more money.

Back in a lively Tefal, talk to the elderly woman in the southern-most house to open the Ludon Highlands.
GEMSTONE MINE (2)
Occurs 8 generations after annexing Ludon.
There is a problem with the mine (the miners keep collapsing) and the production has dropped to nada!
This won't do: let us investigate. As you go deeper into the mine, you come across a new section (see the map in the previous section).
Enemies: Ghost, Undead, Skeleton.
Loot: Magic Stone Fragment (Demon Stone Shard), 300kG.


At the end of the (very short) path, a Demon Magic Stone: break it (the production is restored) and get the Shard.
With it, the craftsmole in the Savannah can make you a nice Darkstone Ring - see the Items section - but it is cursed (unremovable, and -1LP for all but the equipped character, whose LP are restored, when sleeping anywhere but in your own bed)(and a cool and creepy little night music plays : ).
LUDON HIGHLANDS
Open by talking to the elderly woman in the southern-most house of revived Tefal after clearing the Gemstone Mine.

Enemies: Beast, Amphibian, Flying, Snake, Plant, Spirit.
Loot: None.
The Ludon Highlands area serves as a passage and a crossroads.
There are two exits: West is Lake Aqua, South is the Saigo Village in Nazelle.
The Lake Aqua is pretty and only related to the Bard Quest; your destination lies South.


***
NAZELLE
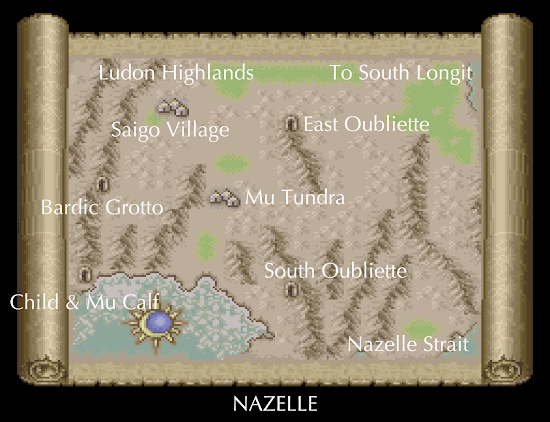
Most quests in Nazelle are interrelated. It all starts at your point of entry:
SAIGO VILLAGE
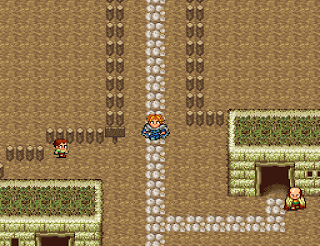
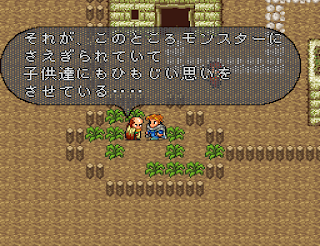
From Ludon Highlands you reach the Saigo Village. There dwell the Saigo clansmen who have forsaken a traditional, nomadic and harsher way of life in favour of an easier, sedentary life in a a milder climate. Or so they thought! because monsters are everywhere and everyone is now simply starving..
Talk to the elder (S-W) to open the East Oubliette.
But first a quick word about the specificity of the Dungeons in Nazelle.
DANTARG AND THE DUNGEONS IN NAZELLE

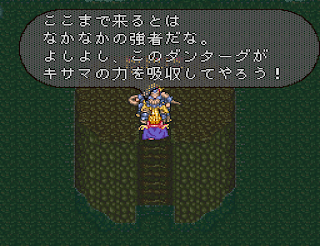
Dantarg, one of the Seven Heroes, can appear in the Nazelle dungeons.
In fact, the dungeon where Dantarg appears, Dantarg's form, the types of monsters that appear in the dungeons, and the passing of generations (traceable via the generations of Hiraga, the genius inventor living in Somon) are all interrelated.
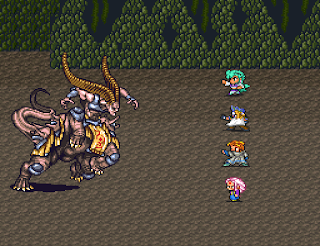
Dantarg is by default in the Mu and Child dungeon, and starts in his first (and weakest) form.
Every 6 generations, Dantarg raids one dungeon (kills the changing enemies and the boss) and becomes stronger (Form Up).
In other words, Dantarg is in the Mu & Child dungeon during 5 generations, then he raids the first dungeon on his list that has not been cleared (order: East Oubliette, South Oubliette, Bardic Grotto).
Concretely, the starting Hiraga generation being the 3rd:
- at Generation 9 he raids the East Oubliette and is found there in his second form;
- at Gen 15: South Oubliette: third form;
- at Gen 21: Bardic Grotto: fourth form.
If you clear a dungeon (kill the boss) before Dantarg's raid, the raid counter is reset, and the next raid will happen 6 generations from then in the next dungeon on his list. E.g.: Clear East Oubliette at Gen 8 -> Dantarg will raid South Oubliette at Gen 14.
Special case: if you meet him in battle and lose (or retreat and leave), he becomes stronger and immediately goes back to the Child & Mu Calf dungeon; the boss of the dungeon where you lost to him is revived, the monsters are reset, and the next raid will happen in 5 generations (the present generation is counted as spent in the Mu & Child dungeon) in the same dungeon. E.g. if you lose to him at Gen 9 in the East Oubliette, if you come back there with your new Emperor he won't be there anymore, there will be Snake enemies, and he will raid the East Oubliette again in Gen 14.
This all means that if you want to face an easy Dantarg, prevent him from raiding the dungeons by clearing them before he does (East: before Gen 9; then before 6 generations after clearing previous). On the other hand, if you want to face the strongest Dantarg, do not clear the caves and let him do his raiding.
EAST OUBLIETTE

Enemies: Skeleton, Plant, Undead, Inorganic, (Snake/Demon/Dantarg).
Loot: None.
The East Oubliette is very straightforward.
After defeating the Boss, talk to one of the children in Saigo Village to open Mu Tundra on the Map (income +400G).
And while you are there you can talk to the elder again to buy a Seabreeze Shell for 1,000 Crowns and open a passage to South Longit and the town of Toba.


MU TUNDRA
In Mu Tundra, talk to the leader and either help or just listen (it will only change the style of his reaction, not your gains): it opens the South Oubliette.
SOUTH OUBLIETTE

Enemies: Slime, Insect, Skeleton, Undead, Beast, Demon, (Reptile/Spirit/Dantarg).
Loot: Splasher, 260kG.
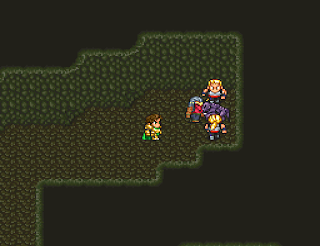
The South Oubliette is maze-ish, but you can jump over the single stones by dashing.
Defeat the Boss to clear the cave.
Back at Mu Tundra, speak to the leader to forge bonds with the Saigo Clan and to annex Nazelle (income +400G again). Congratulations!
You can now head even further South, through the Nazelle Strait.
NAZELLE STRAIT
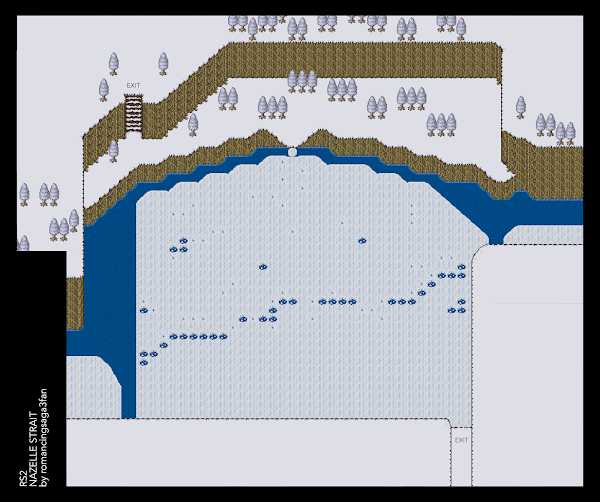
Enemies: Aquatic.
Loot: None.
The Nazelle Strait is a short puzzle of sorts: you slide on the ice in a straight ligne, and the tiles with cracks, crossed once, break and will afterwards stop your uncontrollable ice-skating.
The shortest ways to the S exit are: down right left up right down, or down up right up right down.
The N exit leads to Nazelle; the S exit leads to the Frozen Sea region.
This is the only way to reach Mu Habitat, the Gelid Ruins and the Last Dungeon.
CHILD AND MU CALF

Enemies: Undead, Skeleton, Amphibian, Inorganic, Spirit, Ghost, Serpent, Insect, Aquatic, Plant, Beast, Demon.
Loot: Power Belt, 200kG.
See below (Frozen Sea: Mu Habitat) to open the Child & Mu Calf cave.
This is Dantarg's home by default.
The Mu Calf's cry will help you choose the right way, on the threshold of every correct hole, door or stairs.
In the first room, 4th hole from the top.
In the second room, go right.
In the third room, hidden door south.
Then the exit in the N-E: Dantarg is there (most of the time).
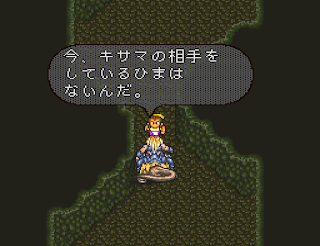
You can try to avoid him, he will catch up; ensues an amusing dialogue.
Dantarg will have grown as much as you have let him!


After defeating him, talk to the Child to complete the mission.
(Sometimes the child is not there: you have to go Mu Habitat in the Frozen Sea region and talk to the leader to make the Saigo migrate to Nazelle, and redo the dungeon from the start.. Remaster only?)
But before that, go one room deeper for two chests, easily overlooked.
Mind that if the Emperor who defeated Dantarg is replaced (LP-killed or Time Jump) before talking to the Child & Mu Calf, those two go back to the Saigos on their own and you cannot trigger a black screen anymore.
BARDIC GROTTO

Enemies: Amphibian, Spirit, Aquatic, Fish, Spirit, (Insect/Beastman/Dantarg).
Loot: Ranseur, Toamarine Axe, Bard's Flute, 430kG.
During the Bard Quest, talk to a boy in Saigo Village to open the Bardic Grotto.
The Flute is in the last room (careful not to exit the room before opening all the chests, you would have to restart from the beginning).
***
FROZEN SEA
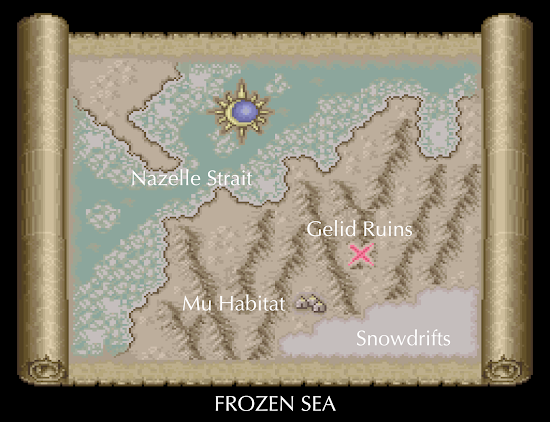
The Frozen Sea (aka South Nazelle) is accessed via the Nazelle Strait in Nazelle.
This region cannot be annexed and thus cannot be accessed directly from the World Map.
For your showdown with Subier (located in the Frozen Sea but accessed from Mobelm after events in North & South Longit), see this section.
For Snowdrifts, see the Last Emperor section.
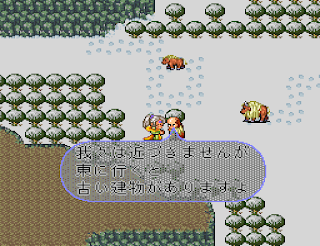
MU HABITAT

In Mu Habitat, talk to the elder to open the Gelid Ruins.
After opening the Gelid Ruins, talk to the leader to be able to trigger the Child & Mu Calf quest: head back to Mu Tundra in Nazelle and talk to the leader to hear him worry about a lost child and a Mu calf: this opens the cave named to-the-point-ly 'Child and Mu Calf' (see the dedicated section above in Nazelle).
You can recruit the Saigo leader if you wish.
The Saigo clan has two locations: Mu Tundra (Nazelle) or Mu Habitat (Frozen Sea). They will migrate if you talk to the leader once. Talk to him a second time to keep them where they are.
GELID RUINS
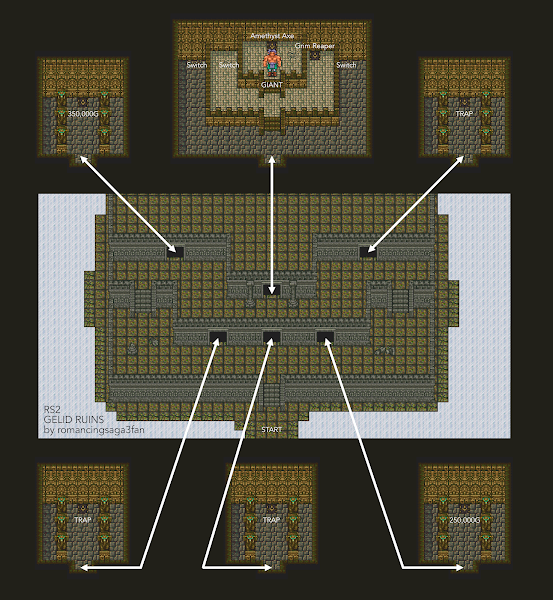
Enemies: Beastman, Plant, Skeleton, Demon, Slime, Undead.
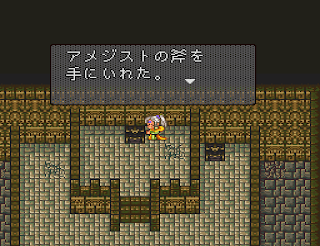
Loot: Grim Reaper, Amethyst Axe, 600kG.
The Gelid Ruins are a mini-dungeon, opened by talking to the elder in Mu Habitat.
Treasures with money in the first room on the right among those in front of you at the start, and at the top left of the map.
Inside the top central room, you have to hit the switches on the sides to unlock stairs to the Giant.

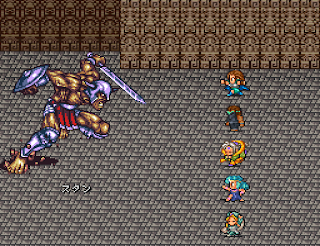
The Giant (22k HP) is a tough enemy that attacks twice per turn but he is susceptible to Stun (and Sleep), so don't be shy, and heal immediately if your Stunning attacks should fail. This is a good place to spark techs, by the way (SparkLV 25). If you come here late, Sword Barrier makes it a walk in the park. Or a pie. Or a piece of cake. Ahem.
The reward is a nice Amethyst Axe. Good job!
Note: The switches on the platform are there to allow you to trigger the stairs should you reload from up there (reloading resets the stairs).
***
Walkthrough Pt. 1 - Introduction | North Varennes | South Varennes | Ludon | Nazelle | Frozen Sea
Walkthrough Pt. 2 - Cumberland | North Longit | South Longit
Walkthrough Pt. 3 - Steppe | Savannah | Melu | Austeros
Walkthrough Pt. 4 - Comroon | Salamat | Jauda | Torrence | Last Emperor
Walkthrough Pt. 2 - Cumberland | North Longit | South Longit
Walkthrough Pt. 3 - Steppe | Savannah | Melu | Austeros
Walkthrough Pt. 4 - Comroon | Salamat | Jauda | Torrence | Last Emperor
QUICK LINKS
No-Spoiler Tips - Game Info - Gameplay - Characters - Techs - Sparking - Magic - Items - Monsters - Bosses - Maps - Trivia & Secrets
Walkthrough: Part 1 - Part 2 - Part 3 - Part 4
COPYRIGHT / ATTRIBUTIONS
Except where noted otherwise, I am the author of all parts of this website (including all screenshots, all maps, walkthroughs, translations & adaptations). Evidently, no part of this website may be reproduced, distributed or published without my prior written consent: failing to comply is a violation of author's rights / copyright laws. With the obvious sole exception of a short quote: kindly attribute. Please respect other people's work, like you'd expect other people to respect your own. Thank you!
CONTACT
If you see a typo, an error or would like to make a suggestion, feel free to contact me: romancingsaga3fan@gmail.com
See also --> ROMANCING SAGA 3 BLOGSPOT
YOU ARE SPLENDID
This page was helpful? Feel free to show your support! It is possible via Paypal (here or directly to the e-mail address above). Thank you!